ADW_SUPERFISH
Win32/Adware.SuperFish.A (NOD32), Adware.SuperFish (Symantec)
Windows


Threat Type: Adware
Destructiveness: No
Encrypted: Yes
In the wild: Yes
OVERVIEW
This adware comes pre-installed in certain Lenovo laptop models sold between September and December 2014. It may help facilitate man-in-the-middle attacks.
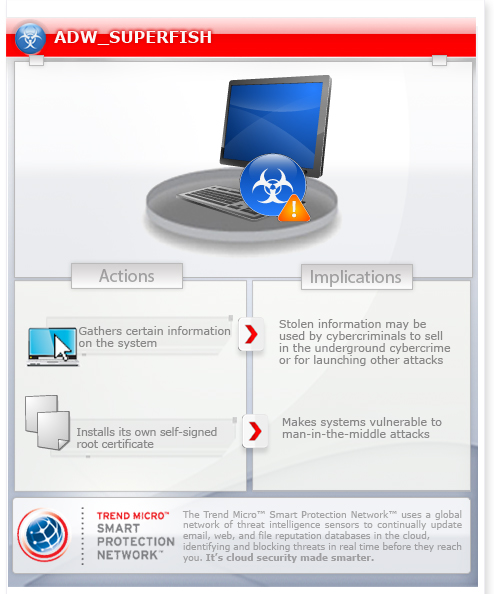
To get a one-glance comprehensive view of the behavior of this Adware, refer to the Threat Diagram shown below.

This adware arrives as a component bundled with malware/grayware packages.
TECHNICAL DETAILS
Arrival Details
This adware arrives as a component bundled with malware/grayware packages.
Installation
This adware drops the following files:
- %User Temp%\VisualDiscoveryr.log
(Note: %User Temp% is the user's temporary folder, where it usually is C:\Documents and Settings\{user name}\Local Settings\Temp on Windows 2000, Windows Server 2003, and Windows XP (32- and 64-bit); C:\Users\{user name}\AppData\Local\Temp on Windows Vista (32- and 64-bit), Windows 7 (32- and 64-bit), Windows 8 (32- and 64-bit), Windows 8.1 (32- and 64-bit), Windows Server 2008, and Windows Server 2012.)
Information Theft
This adware gathers the following data:
- Path of malware execution
- PID of malware process
- OS Version
NOTES:
It installs its own self-signed root certificate making systems vulnerable to man-in-the-middle attacks.
It intercepts HTTP(S) traffic using its own self-signed root certificate.
SOLUTION
Step 1
Before doing any scans, Windows XP, Windows Vista, and Windows 7 users must disable System Restore to allow full scanning of their computers.
Step 2
Close all opened browser windows
Step 3
Remove ADW_SUPERFISH by using its own Uninstall option
Step 4
Search and delete these files
- %User Temp%\VisualDiscoveryr.log
Step 5
Scan your computer with your Trend Micro product to delete files detected as ADW_SUPERFISH. If the detected files have already been cleaned, deleted, or quarantined by your Trend Micro product, no further step is required. You may opt to simply delete the quarantined files. Please check this Knowledge Base page for more information.
NOTES:
To manually remove the certificate refer to the following instructions:
For Windows 8:
- Search for "Manage Computer Certificates".
- If a Windows Prompt to allow changes appears ("Do you want to allow this program to make changes to this computer?"), press "Yes".
- The Certificate Manager window should appear. It should be divided into Left and Right Panels.
- On the Certificate Manager application, select "Trusted Root Certificate Authorities" located at the Left Panel.
- Click on the sub-selection "Certificates"
- On the Right Panel, find the entry "Superfish, Inc."
- Right click on "Superfish Inc." and select "Delete".
- Should a window appear to confirm the deleting of the certificate ("Deleting system root certificate..."), Press Yes.
- is should delete the selected certificate.
- Restart device.
For other versions:
For Internet Explorer 5, 5.01, and 5.5
- At the "Internet Explorer" toolbar -> Tools -> Internet Options
- At the Internet Options window -> Contents -> Certificates -> Trusted Root Certification Authorities
- Click the certificate "Superflash, Inc." -> Export -> Yes
- Follow the appearing instructions
- Select Trusted Root Certification Authorities
- Click the certificate "Superflash, Inc." -> Remove -> Yes
- Click Close -> OK
- Restart "Internet Explorer"
For Internet Explorer 4.x
- At the "Internet Explorer" toolbar -> View -> Option -> Content ->Authorities
- Click the certificate "Superfish, Inc." -> Delete -> Yes
- Click Close -> OK
- Restart "Internet Explorer".
For Firefox or Thunderbird browsers, please follow the steps below.
- On the Firefox/Thunderbird toolbar, select Tools > Options > Advanced > Certificates.
- Click View Certificates.
- Select Authorities tab, then scroll to SuperFish, Inc..
- Select the row that contains both SuperFish, Inc. and Software Security Device.
- Press Delete or Distrust, then OK.
- Restart your system.
Lenovo released a tool that automatically uninstalls Superfish. Please refer to the following Lenovo support webpage for instructions:
Did this description help? Tell us how we did.


