Hey all! Happy Friday-eve! Very excited this Friday-eve! I wanted to share with you some new experiments in automation that I have been working with and testing in Azure DevOps. These learning experiments are using Infrastructure as Code (IaC) with ARM, Immutable Azure Virtual Machine Architecture with Packer and ARM, and Trend Micro Cloud One Workload Security.
In each of these experiments, I was able to successfully deploy Trend Micro Cloud One Workload Security in the Azure DevOps pipeline. These are all really cool technologies from both Microsoft and Trend Micro to help bridge together and help you to create more automation in your Azure Virtual Machine infrastructure builds, deployments, and security implementation!
Ok, so let's get started!
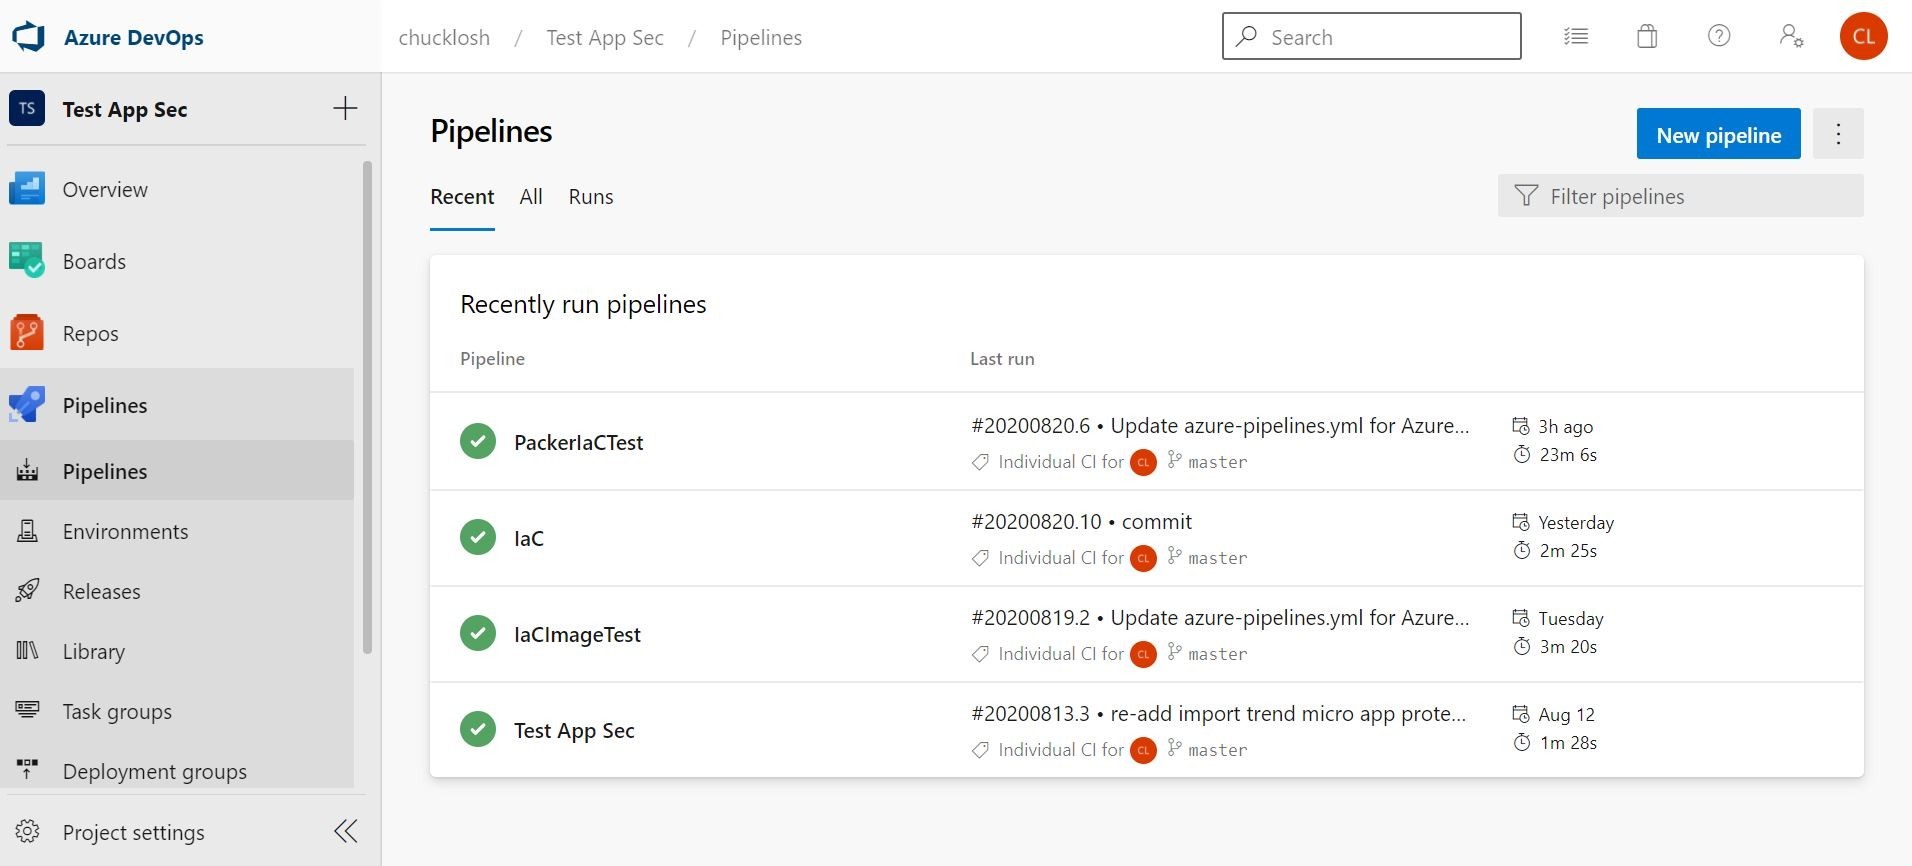
Let's take a quick look where all good pipelines begin and end in Azure DevOps! This is shown below in my Azure DevOps Subscription!
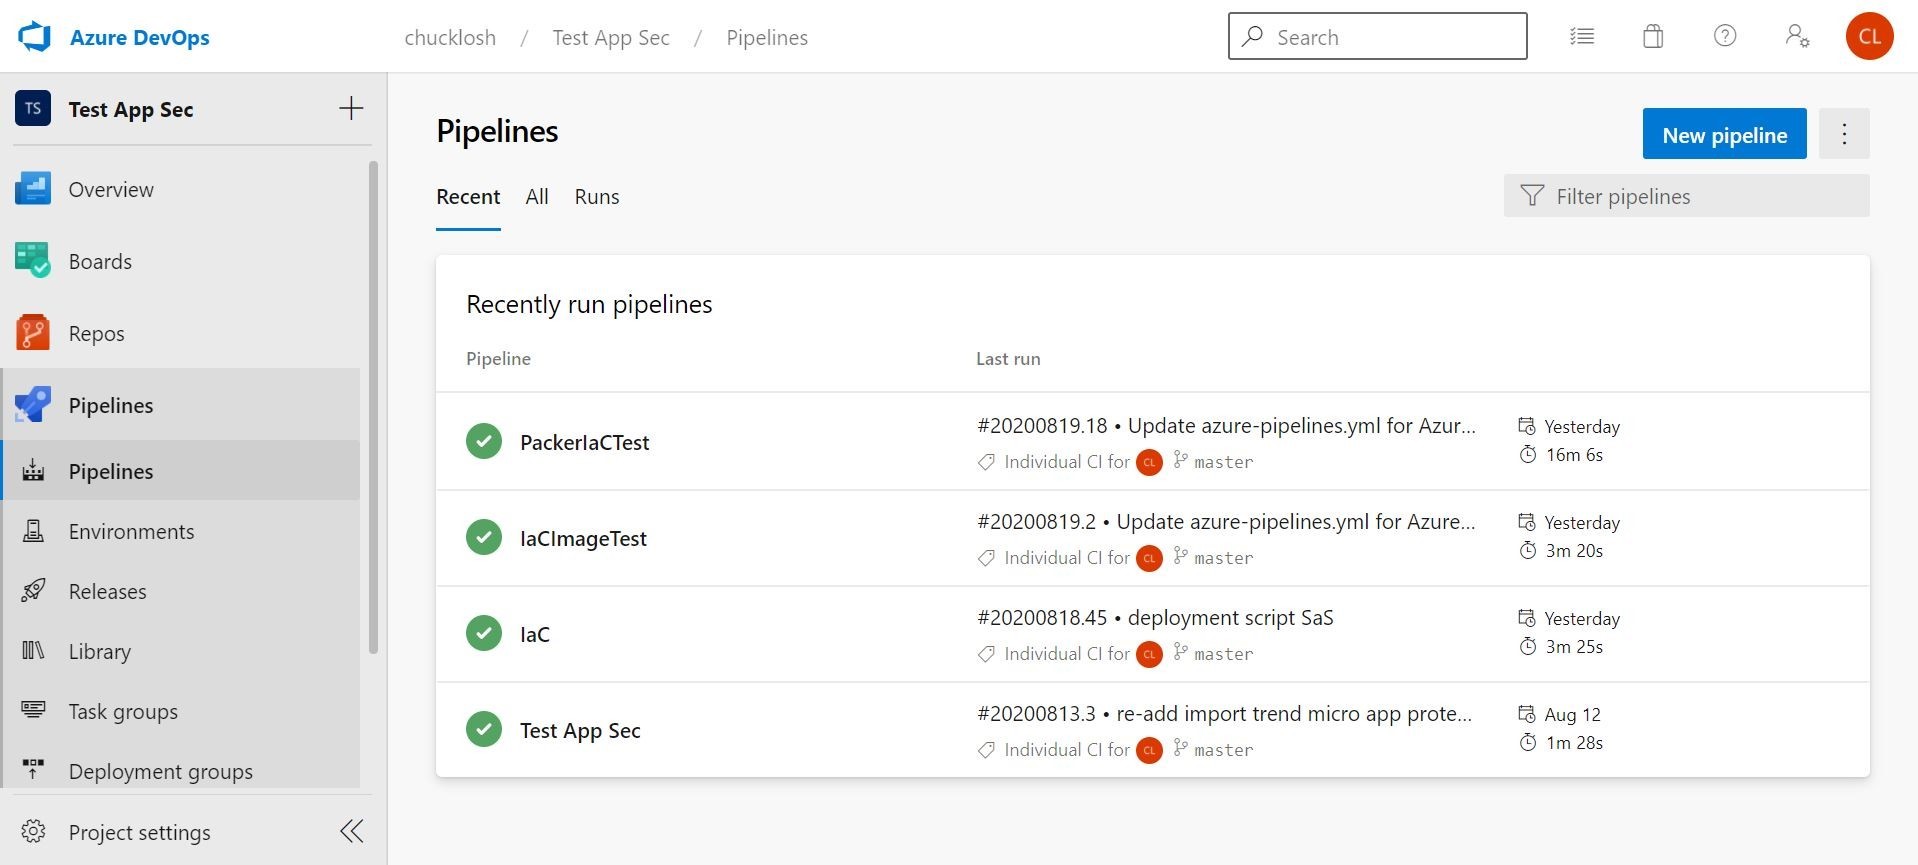
Here are all my test pipelines. We are going to create and execute two test pipelines today dealing with IaC by utilizing ARM and an associated Azure Custom-Script Extension resource, and again with Immutable Architecture with Packer and ARM.
These pipelines are named IaC and PackerIaCTest appropriately.
The first place you start in creating an Azure DevOps Pipeline is Azure Repos. You will want to create a new Private Repo shown below. Then, clone it appropriately in Visual Studio Code! Clone away, my friends! Clone away, Clone away!
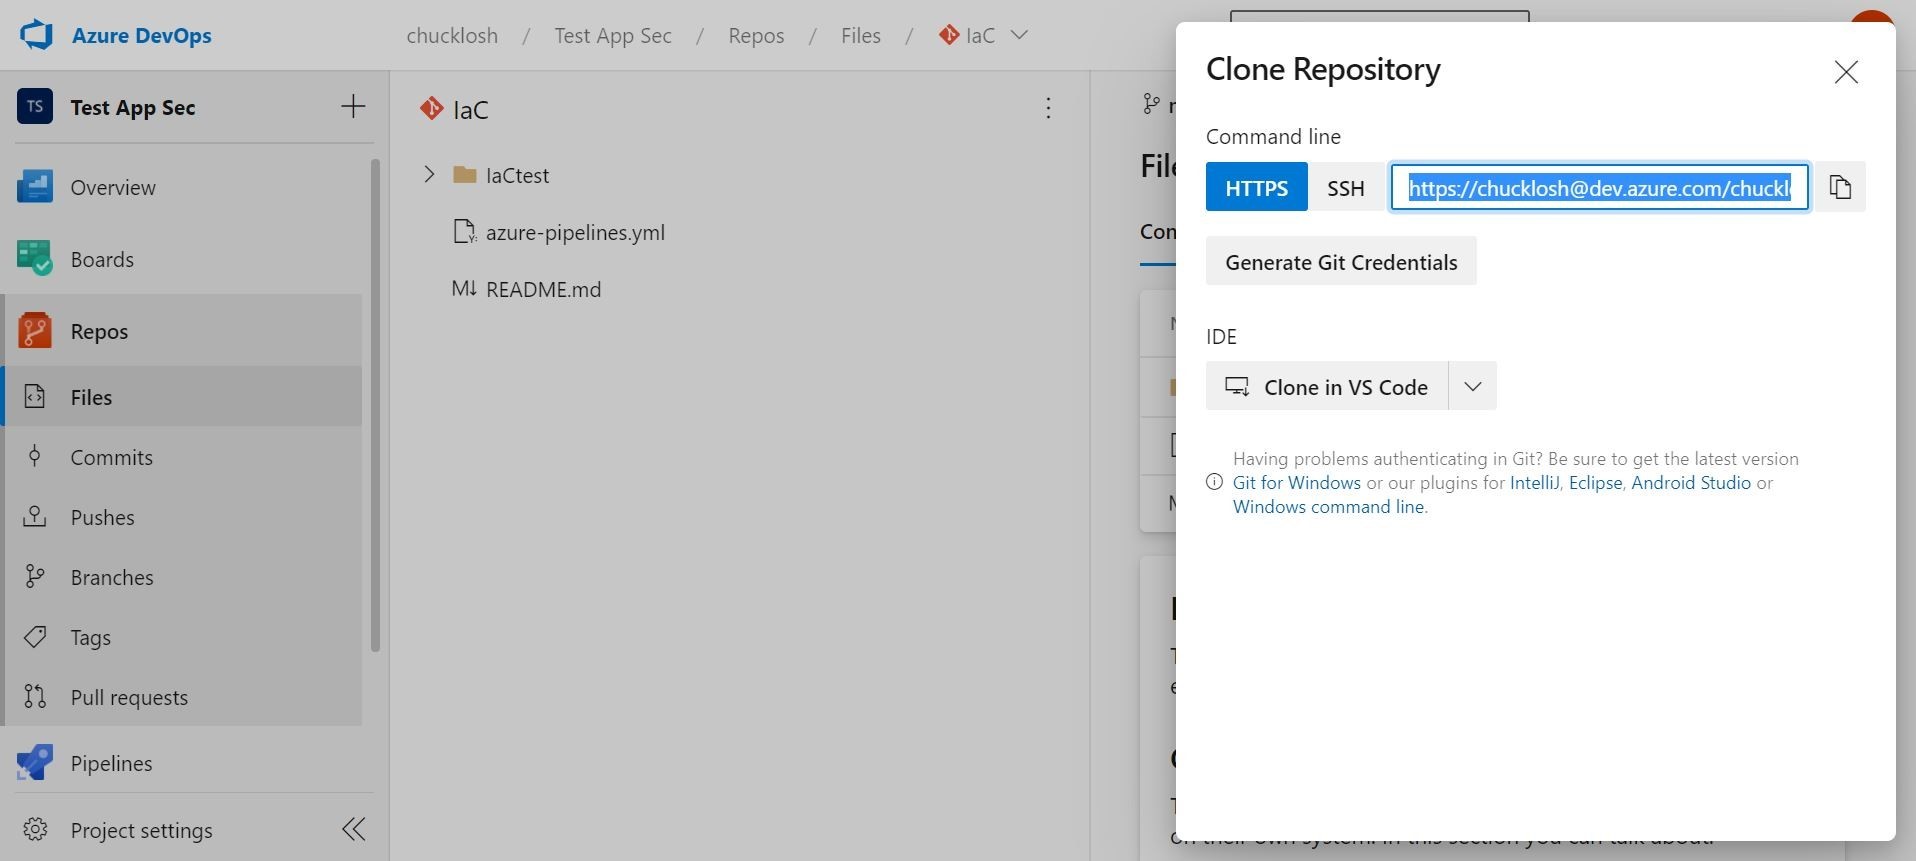
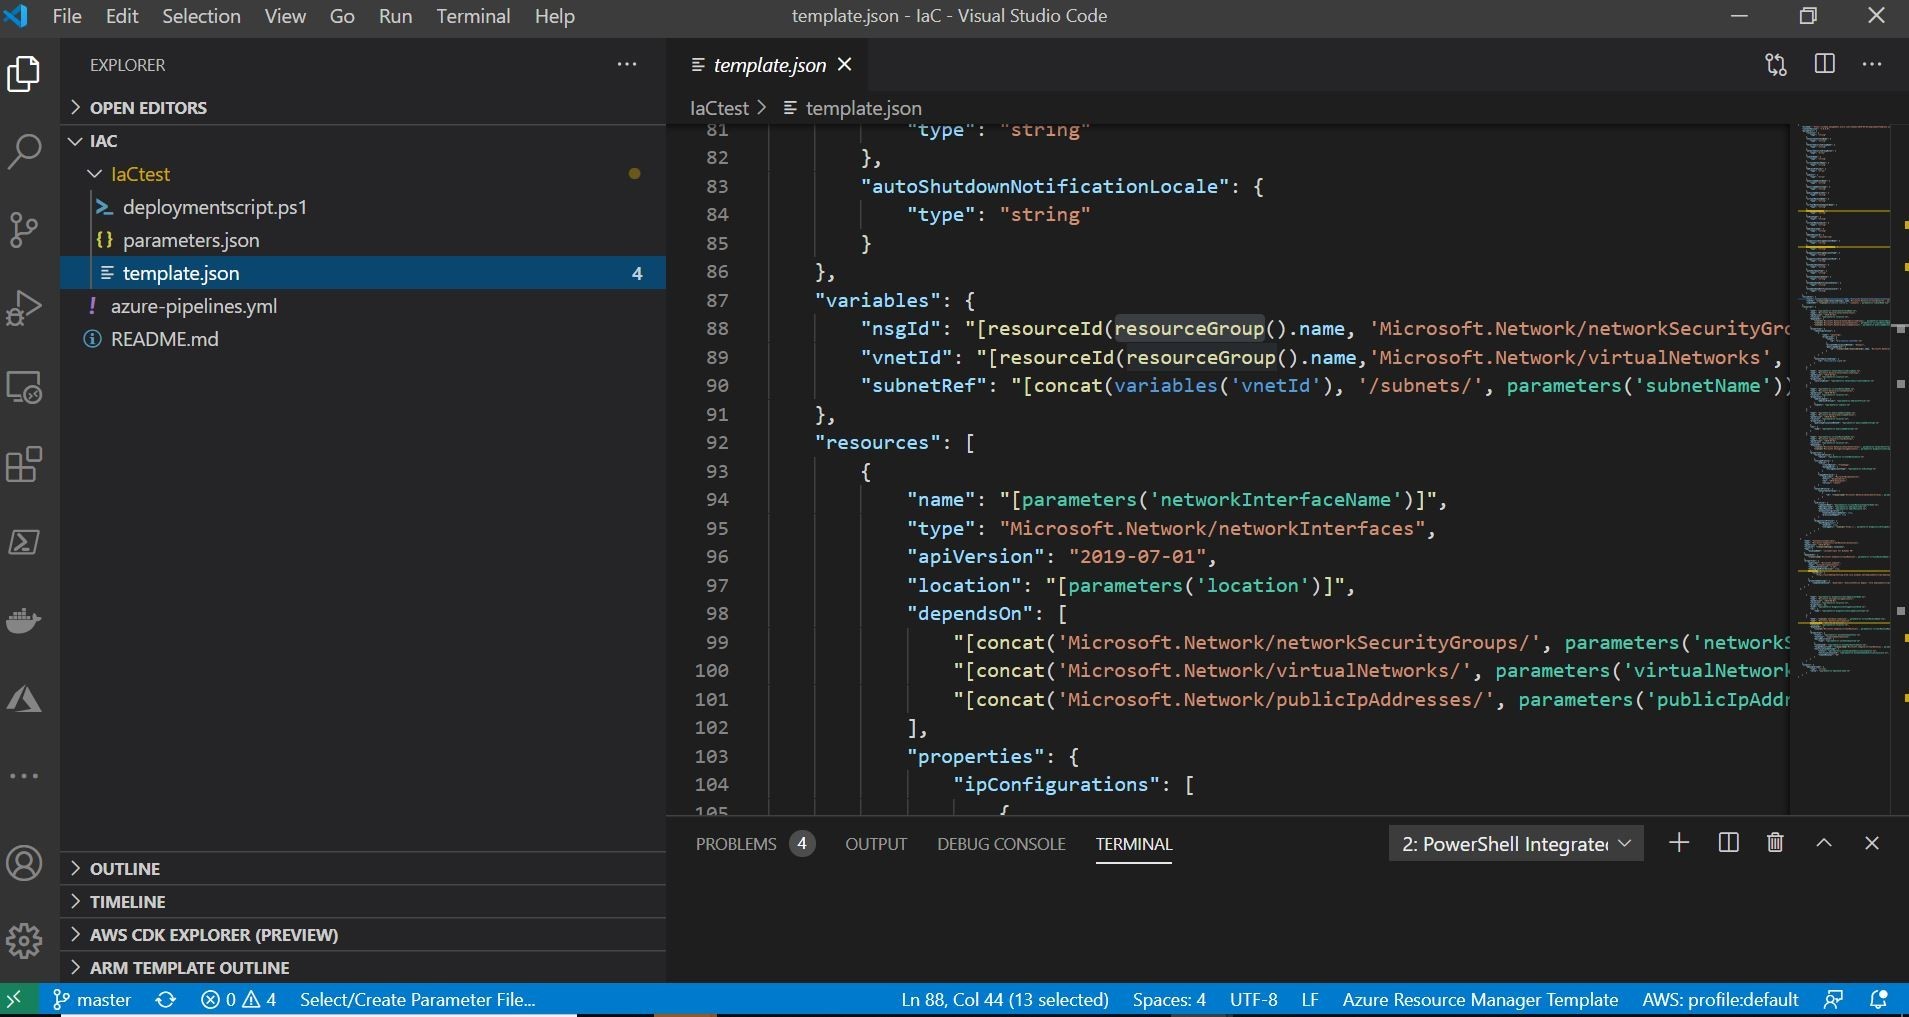
Alrighty, now we have a place to start! Now, you might be asking yourself the following question. How did I get these parameters.json and template.json files? A little secret! I skipped ahead! To get started in IaC, you can generate those right inside your Azure Portal. Whenever you stage a Virtual Machine via the Azure , you can auto magically generate the corresponding ARM (Azure Resource Manager) template for later use for repeated deployments. You can download the files from the Azure Portal in a nice little zip package! This is illustrated below in my Azure Portal! Pro-tip alert! Just kidding!

This is a quick and great way to jump-start in utilizing IaC!
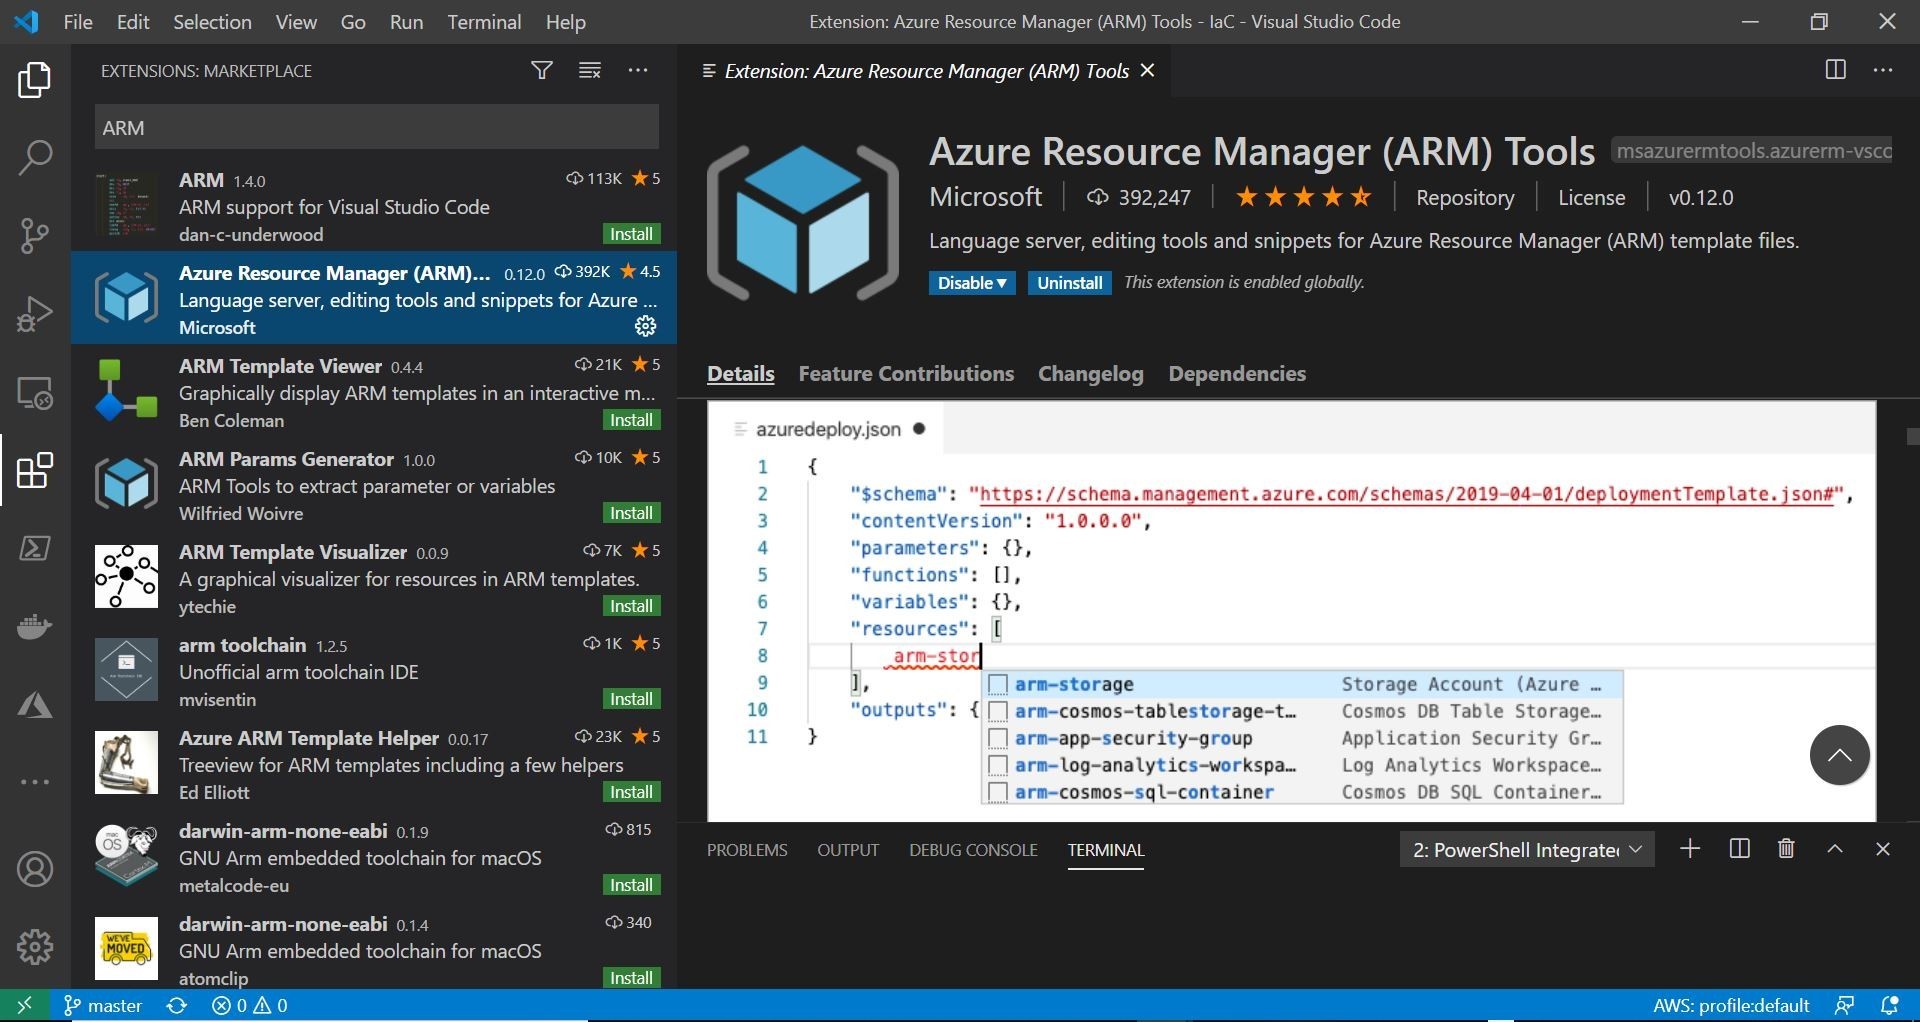
Also, spoiler-alert! You can use the official ARM extension for Visual Studio Code and run snippets and the autocomplete functionality to build your own templates with a few clicks. All, really, really, and I mean really cool stuff! Seriously, it's cool!
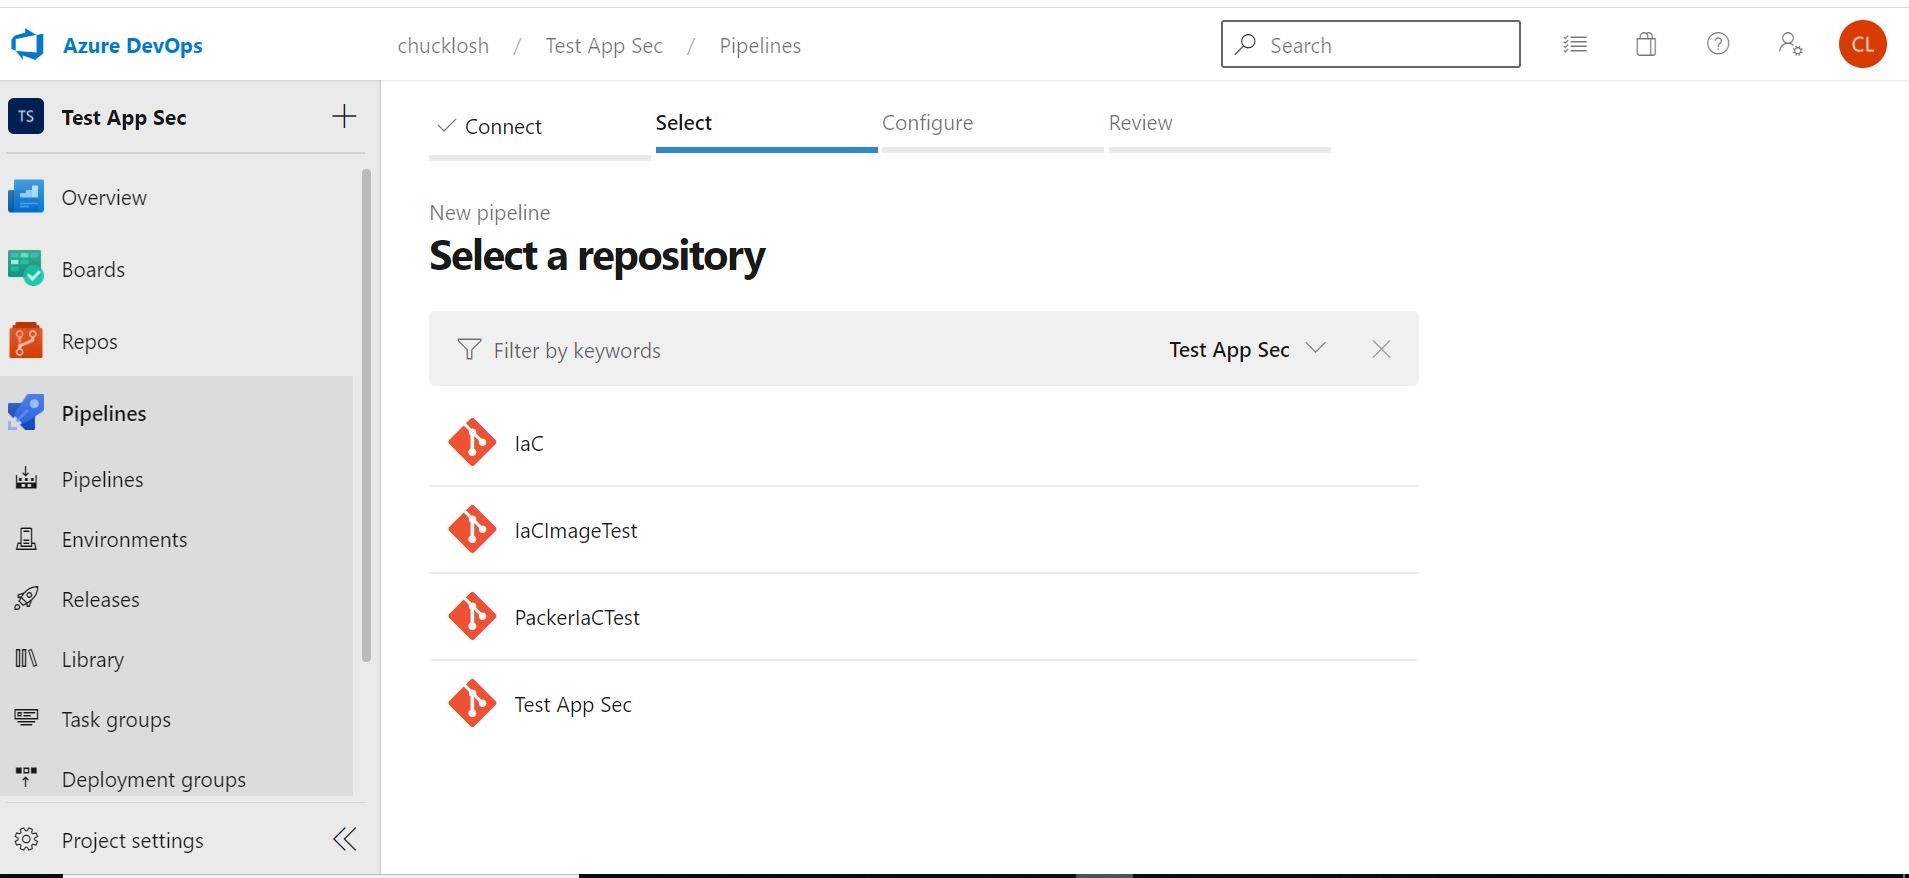
To start the pipeline, under the Pipelines section, the first option you are going to select is the source Repo. In this case it's going to be IaC.
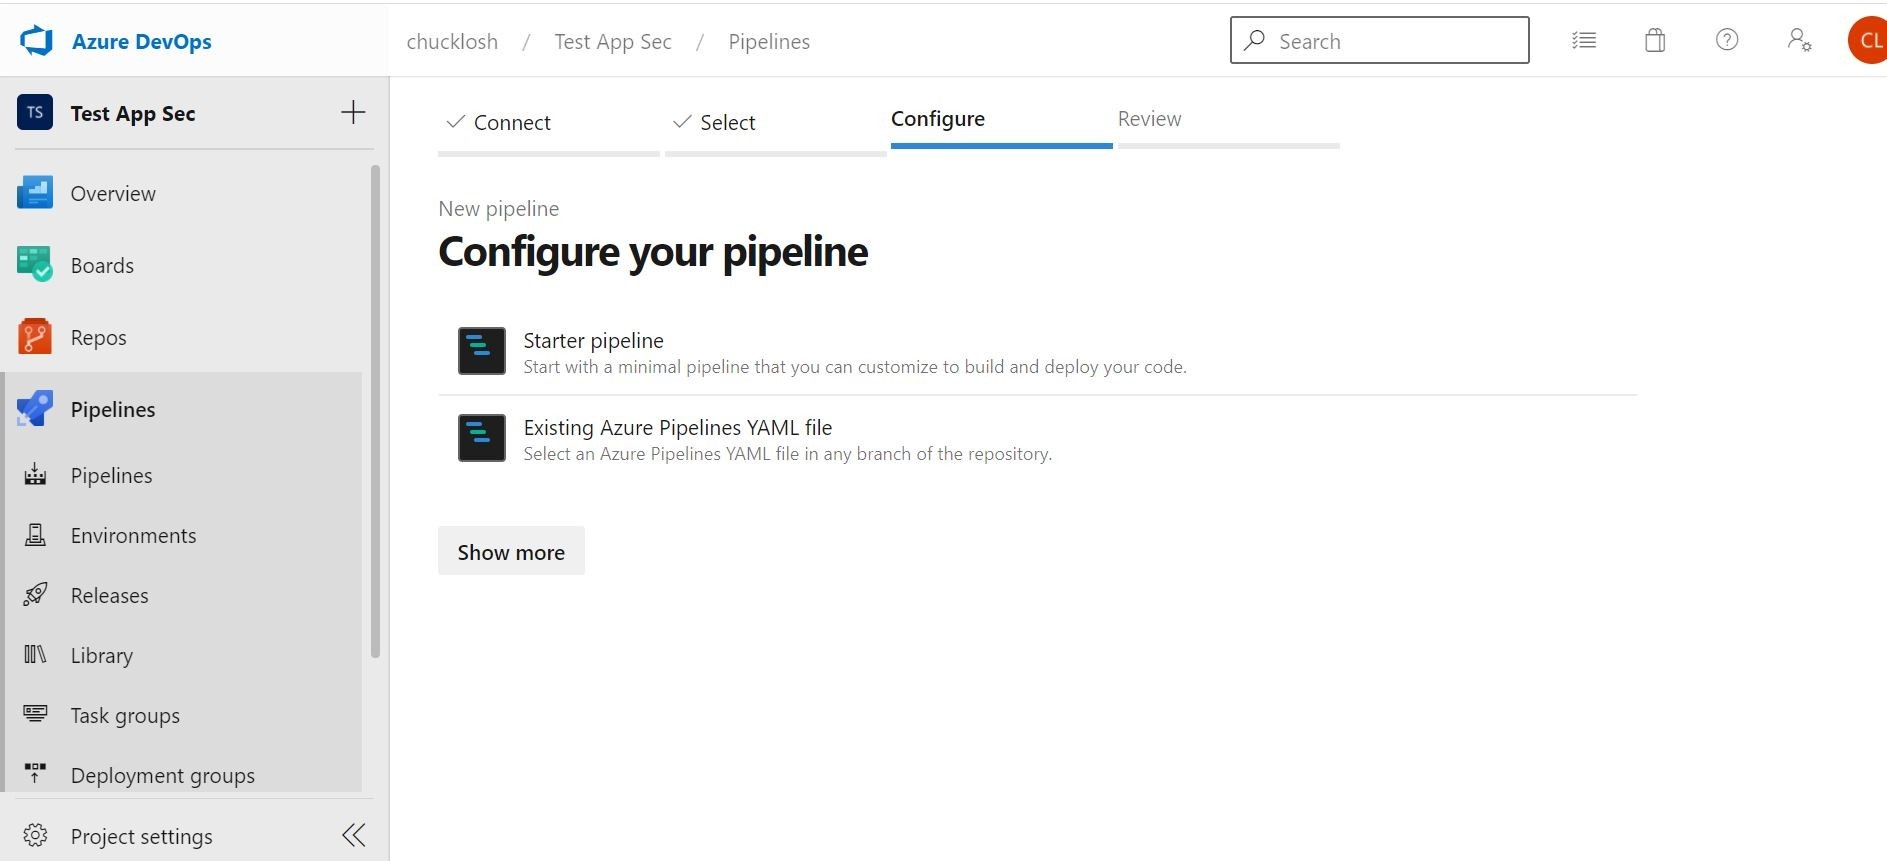
You want to make sure and choose Starter Pipeline.
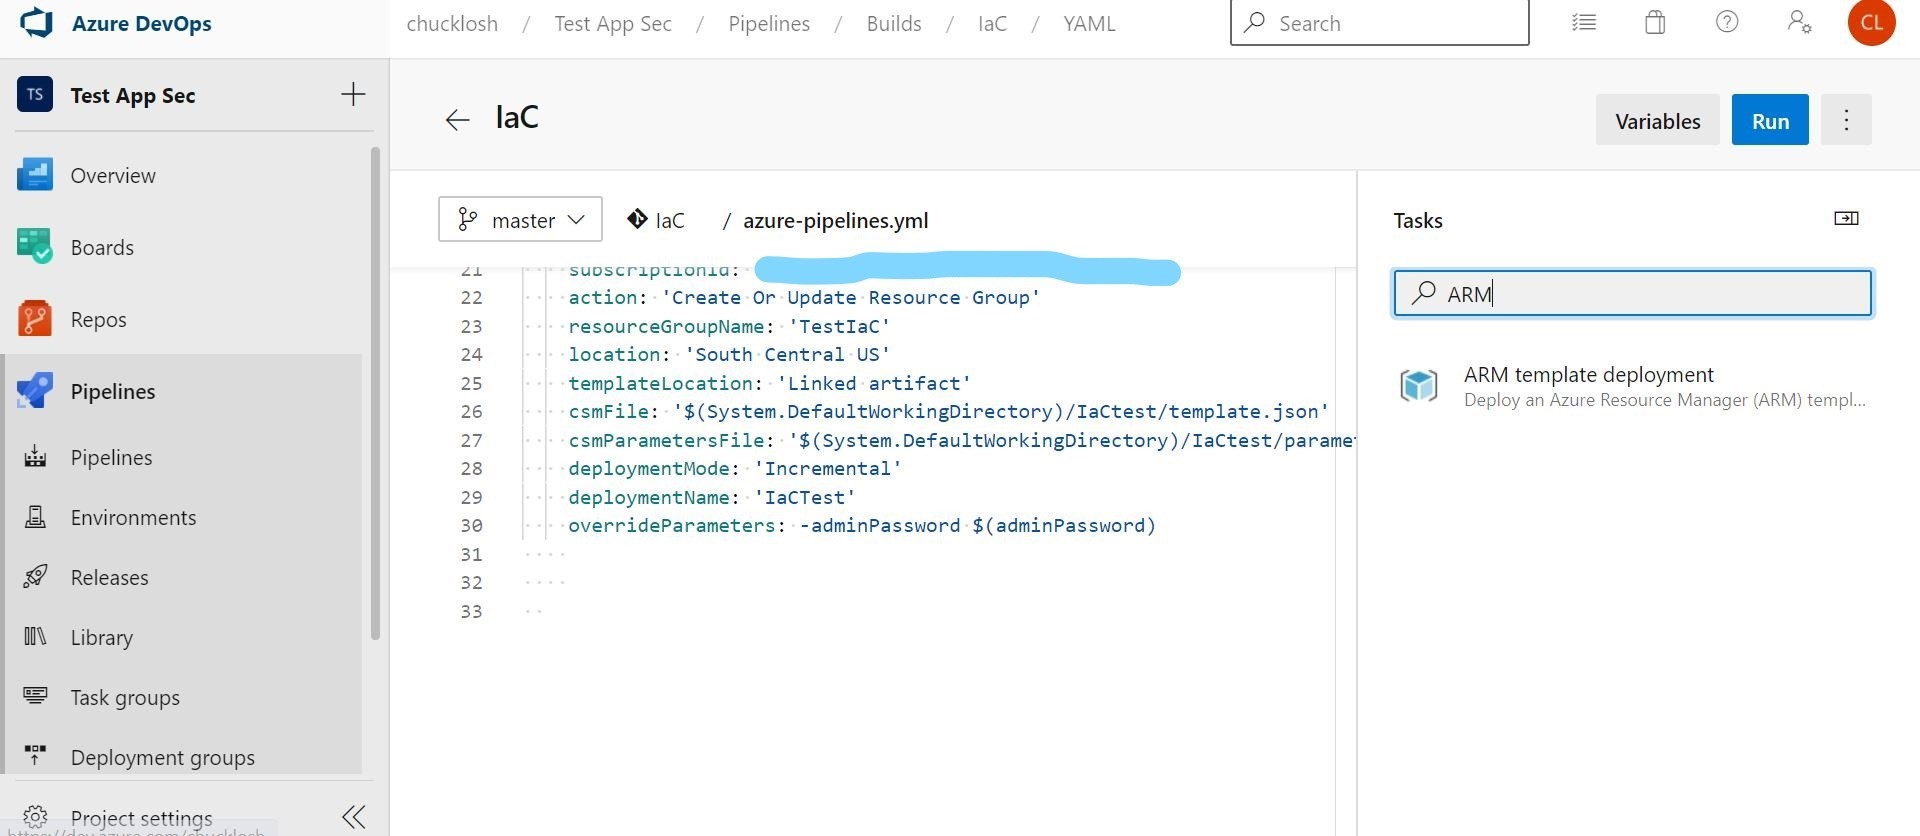
Now, you are going to want to add a task to the pipeline. The task we are going to use is the ARM template deployment. This will walk you through the wizard and add the corresponding YAML attributes to your associated pipeline file bound to that task. This example I created will go ahead and use the generated ARM templates committed in the Repo that I downloaded from the Azure Portal previously.
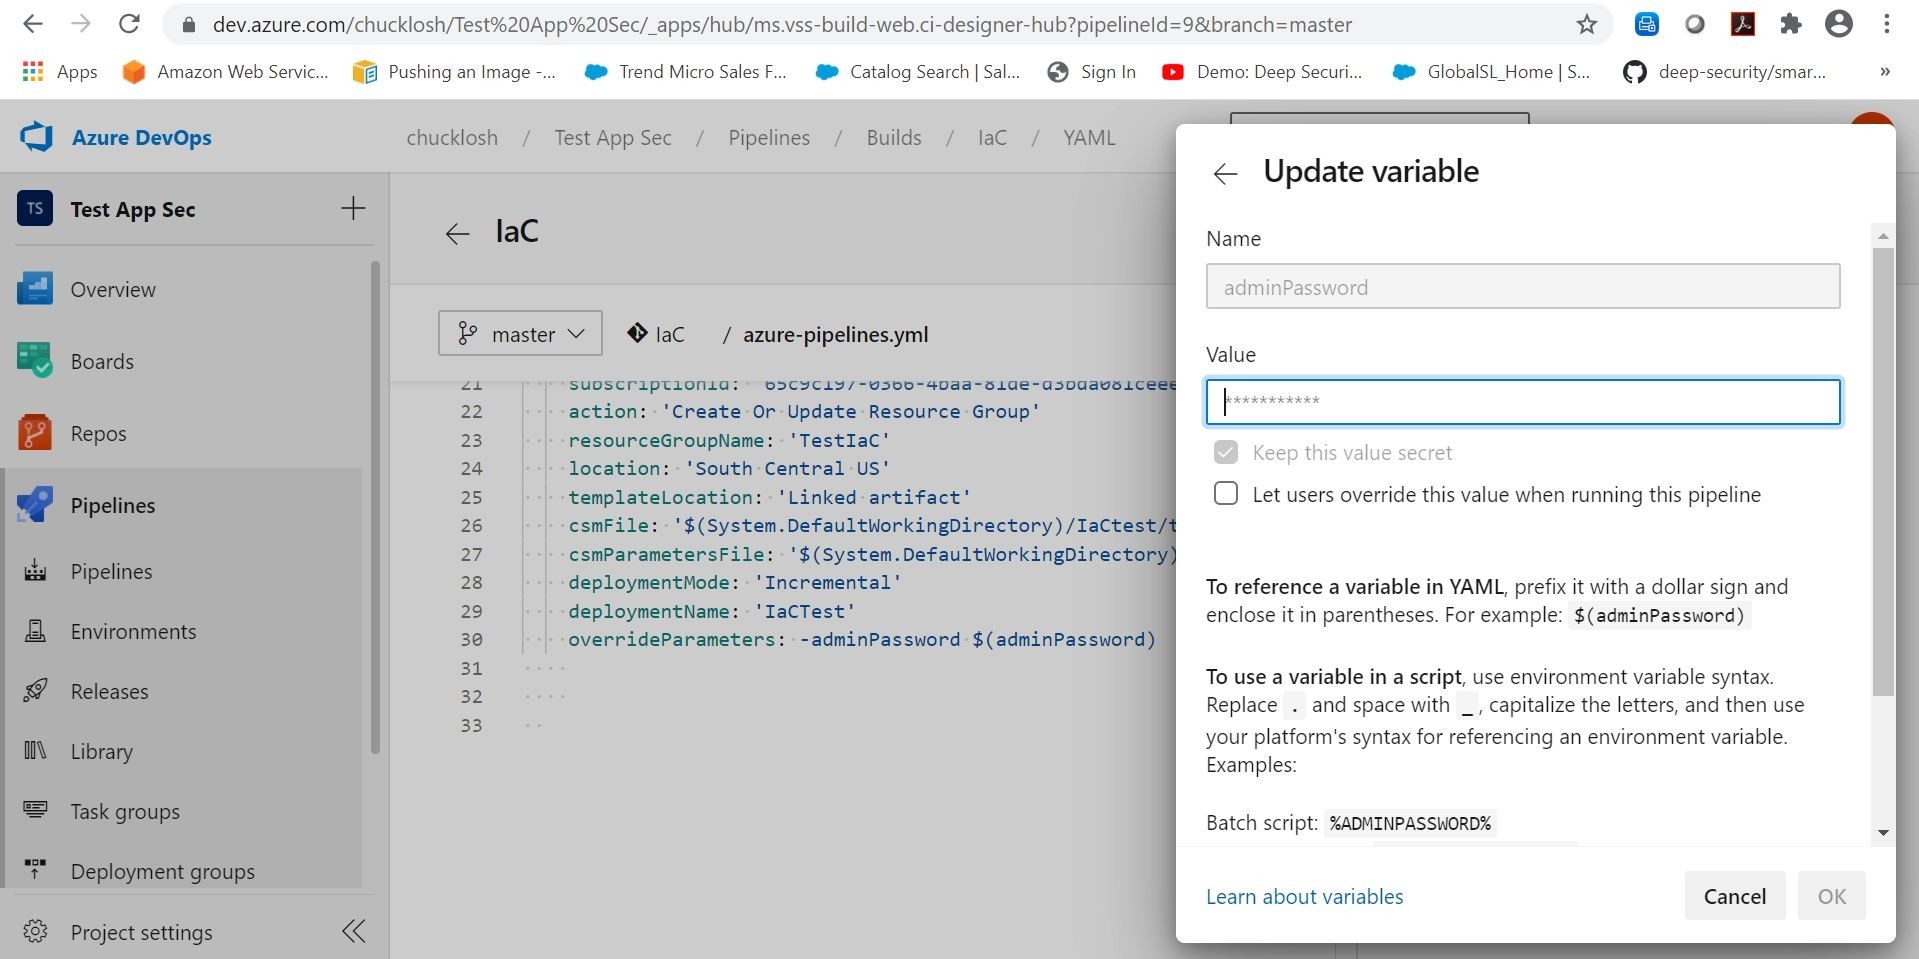
You are going to want to take advantage of Azure DevOps pipeline variables. Why? So, that you can add an adminPassword as an example! You want to choose the option as a stored Azure DevOps secret. That way it is stored as secret, and you can reference the variable as $(adminPassword) in your pipeline configuration. This ensures we can logon to the newly created machine with that password variable. How cool is that? Well, I think it's pretty cool!
Ok, lets go ahead and run through a test deployment and see if that works and provisions a test Azure Virtual Machine using IaC that we can logon to!
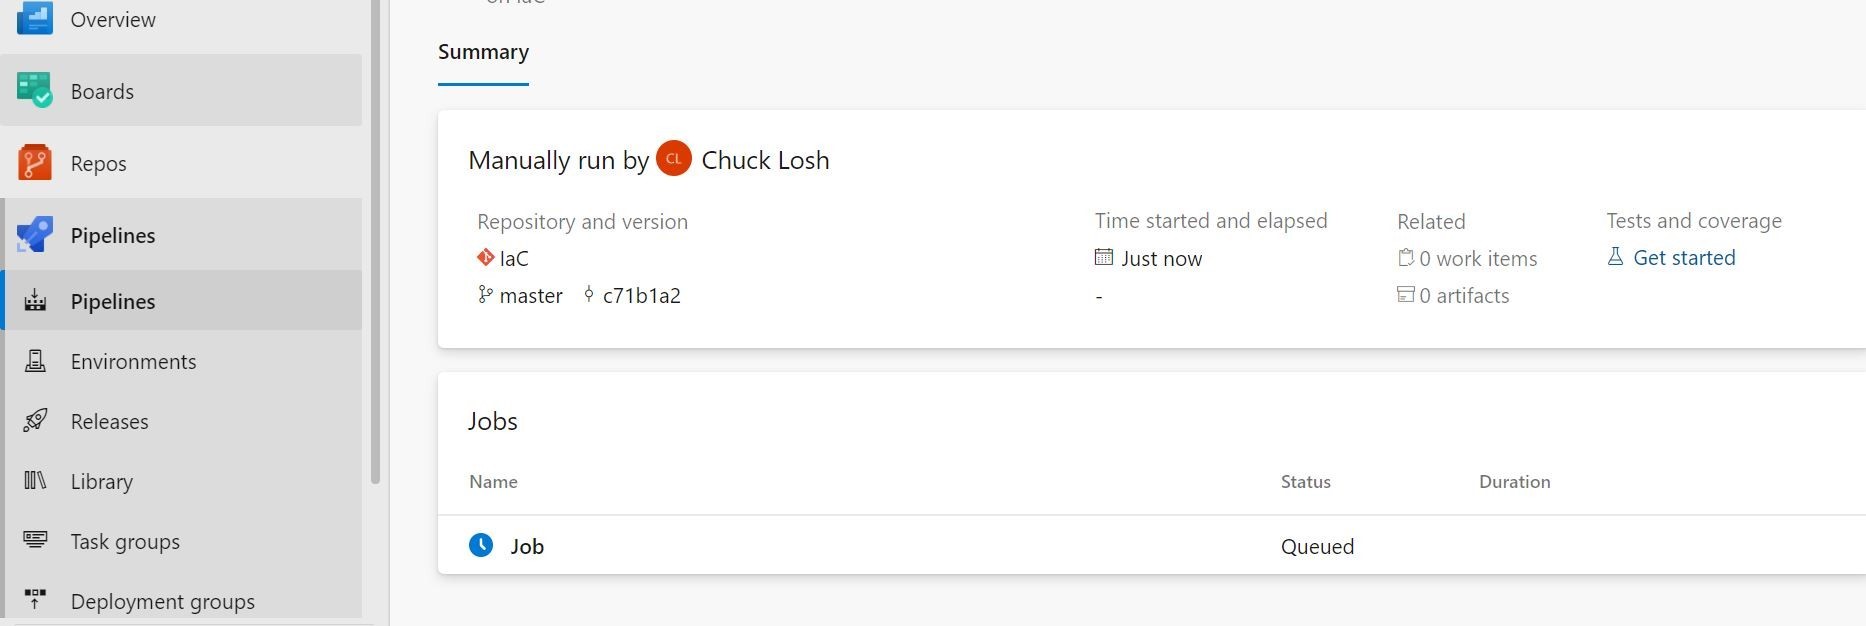
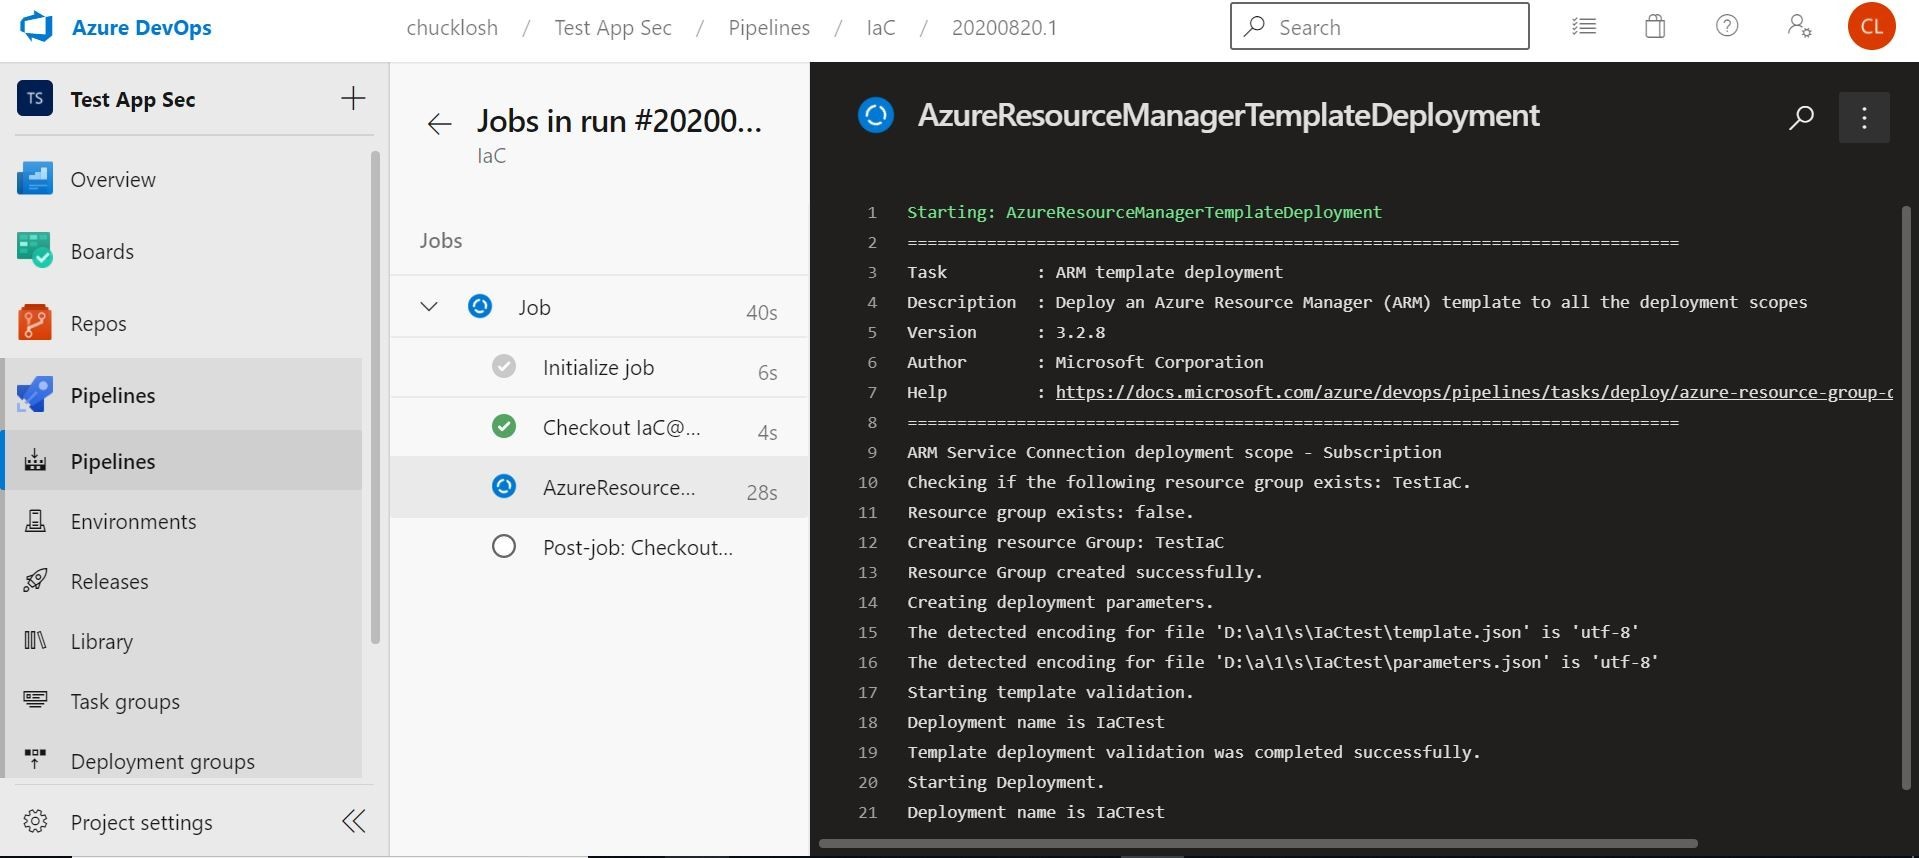
Our IaC pipeline run was successful! Let's see if we can RDP to the test machine and make sure we can get to access to it with the password variable/secret that we used. Yep, Look!
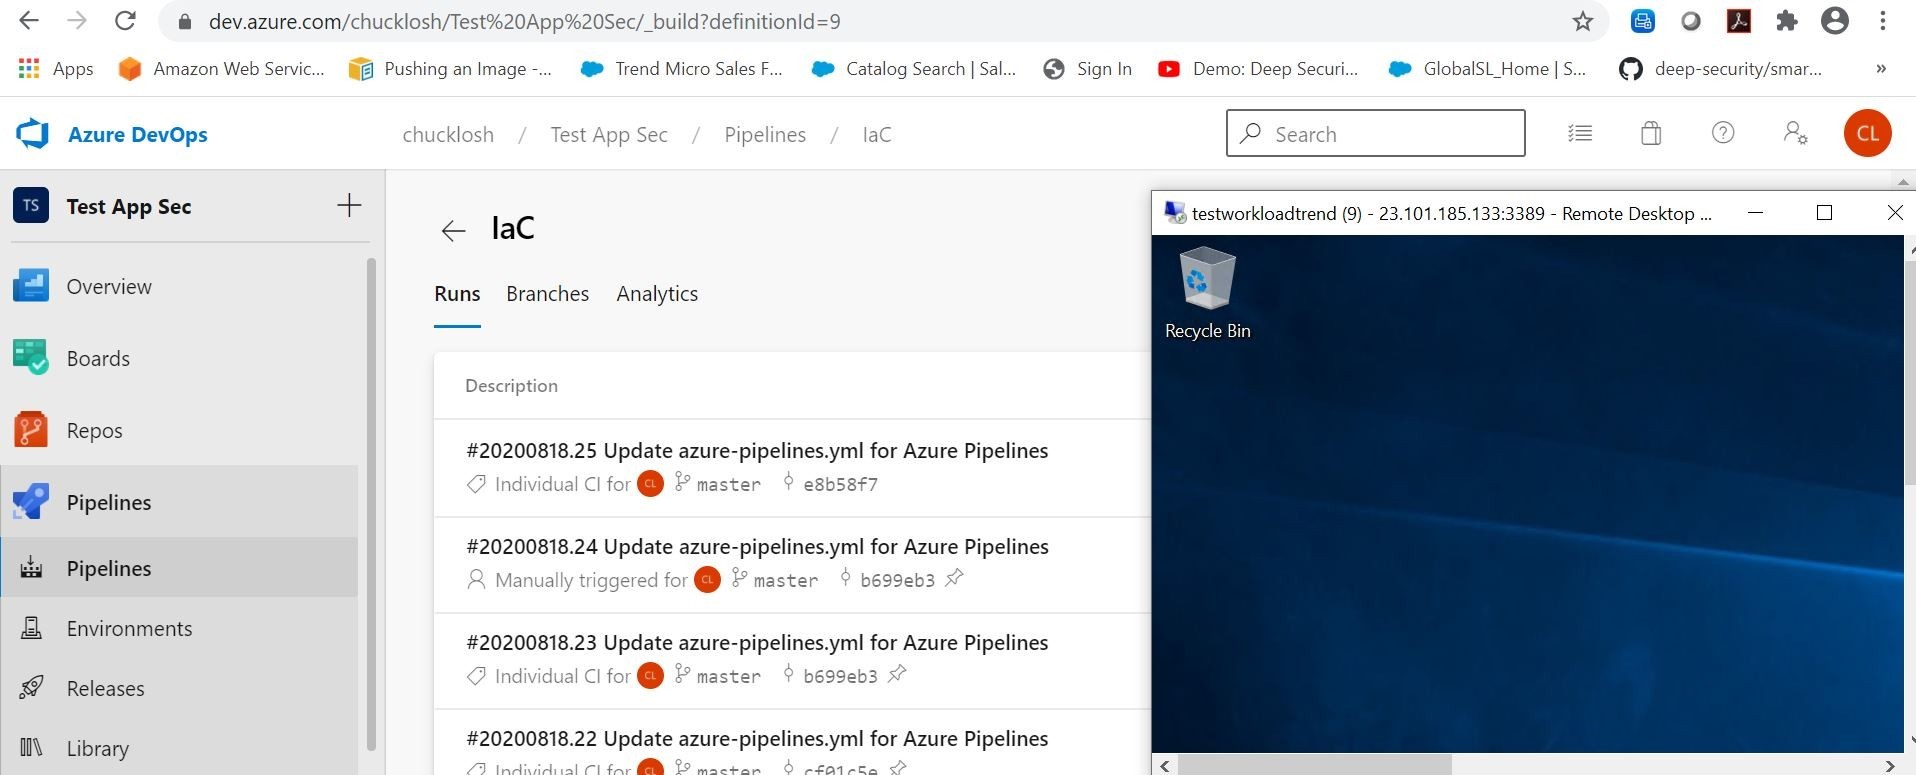
Ok, cool! So, we have successfully deployed our first IaC based deployment with an ARM template generated from my Azure Portal. We did all this utilizing Azure DevOps Pipelines, Azure Repos, and Visual Studio Code. This all works really well together! I am impressed!
Ok, so how can we automatically add security protection from Trend Micro Cloud One Workload Security through our newly created Azure DevOps pipeline?
Good question!
Well, let's go ahead and logon to our Trend Micro Cloud One Workload Security console and download a deployment script.
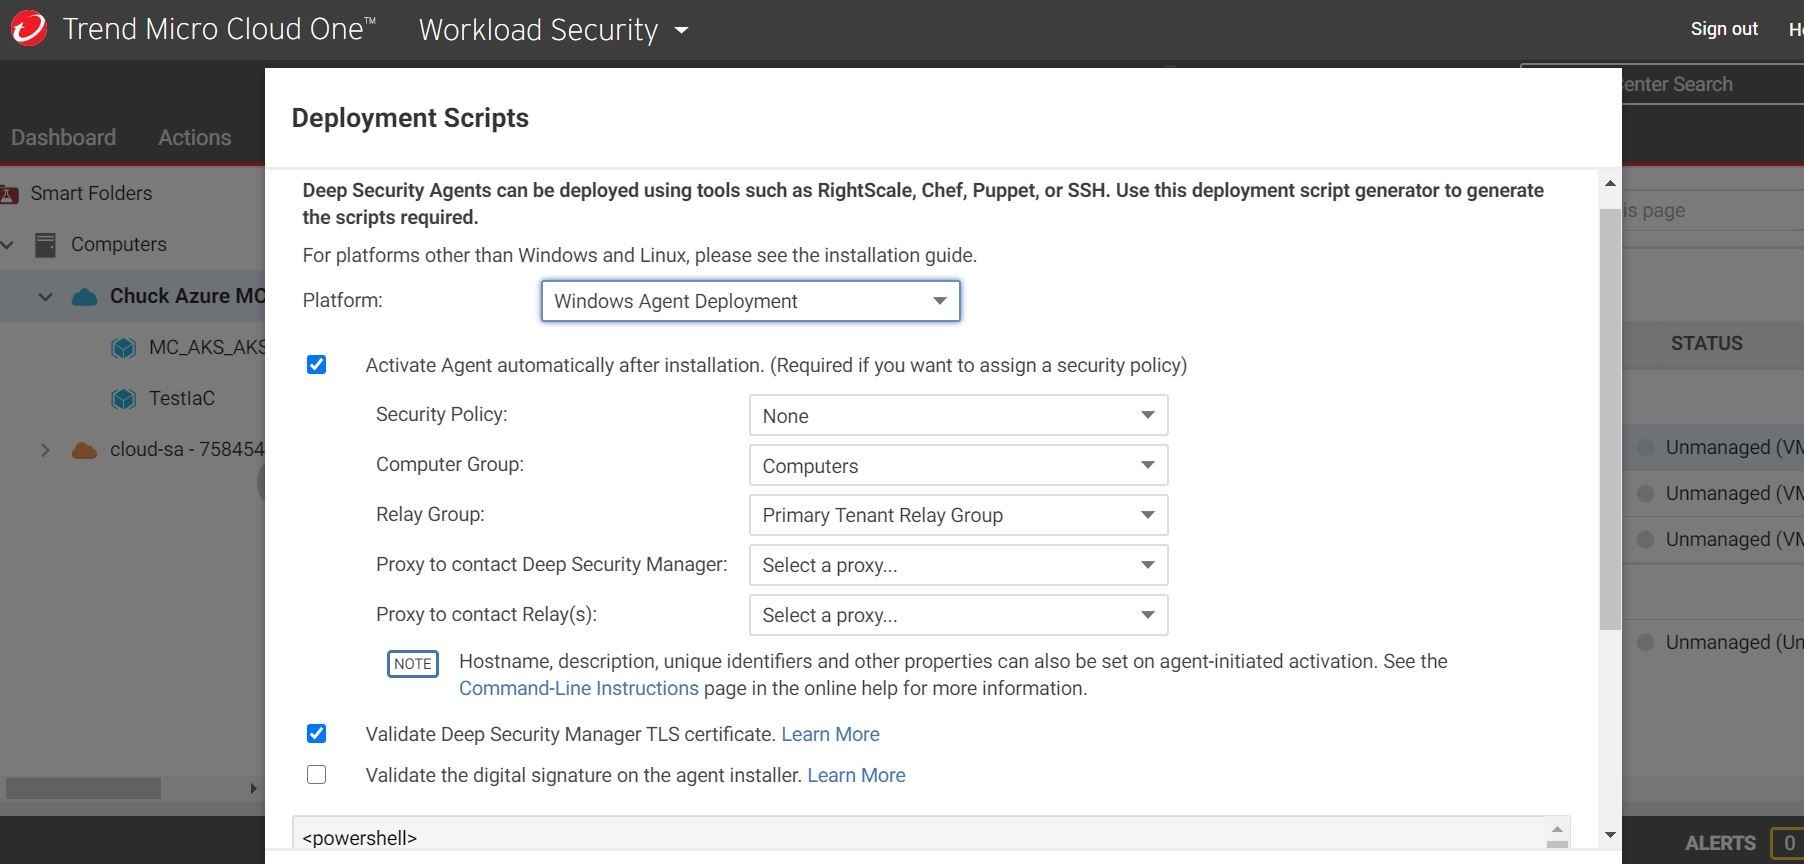
Cool! Look at this! You can set your parameters for your Trend Micro security policy and pick your base OS platform and the Powershell (Windows) or Bash (Linux) will be automatically generated for you! That's nice! That way you don't have to go to a download center and download specific agents to install. Huzzah!
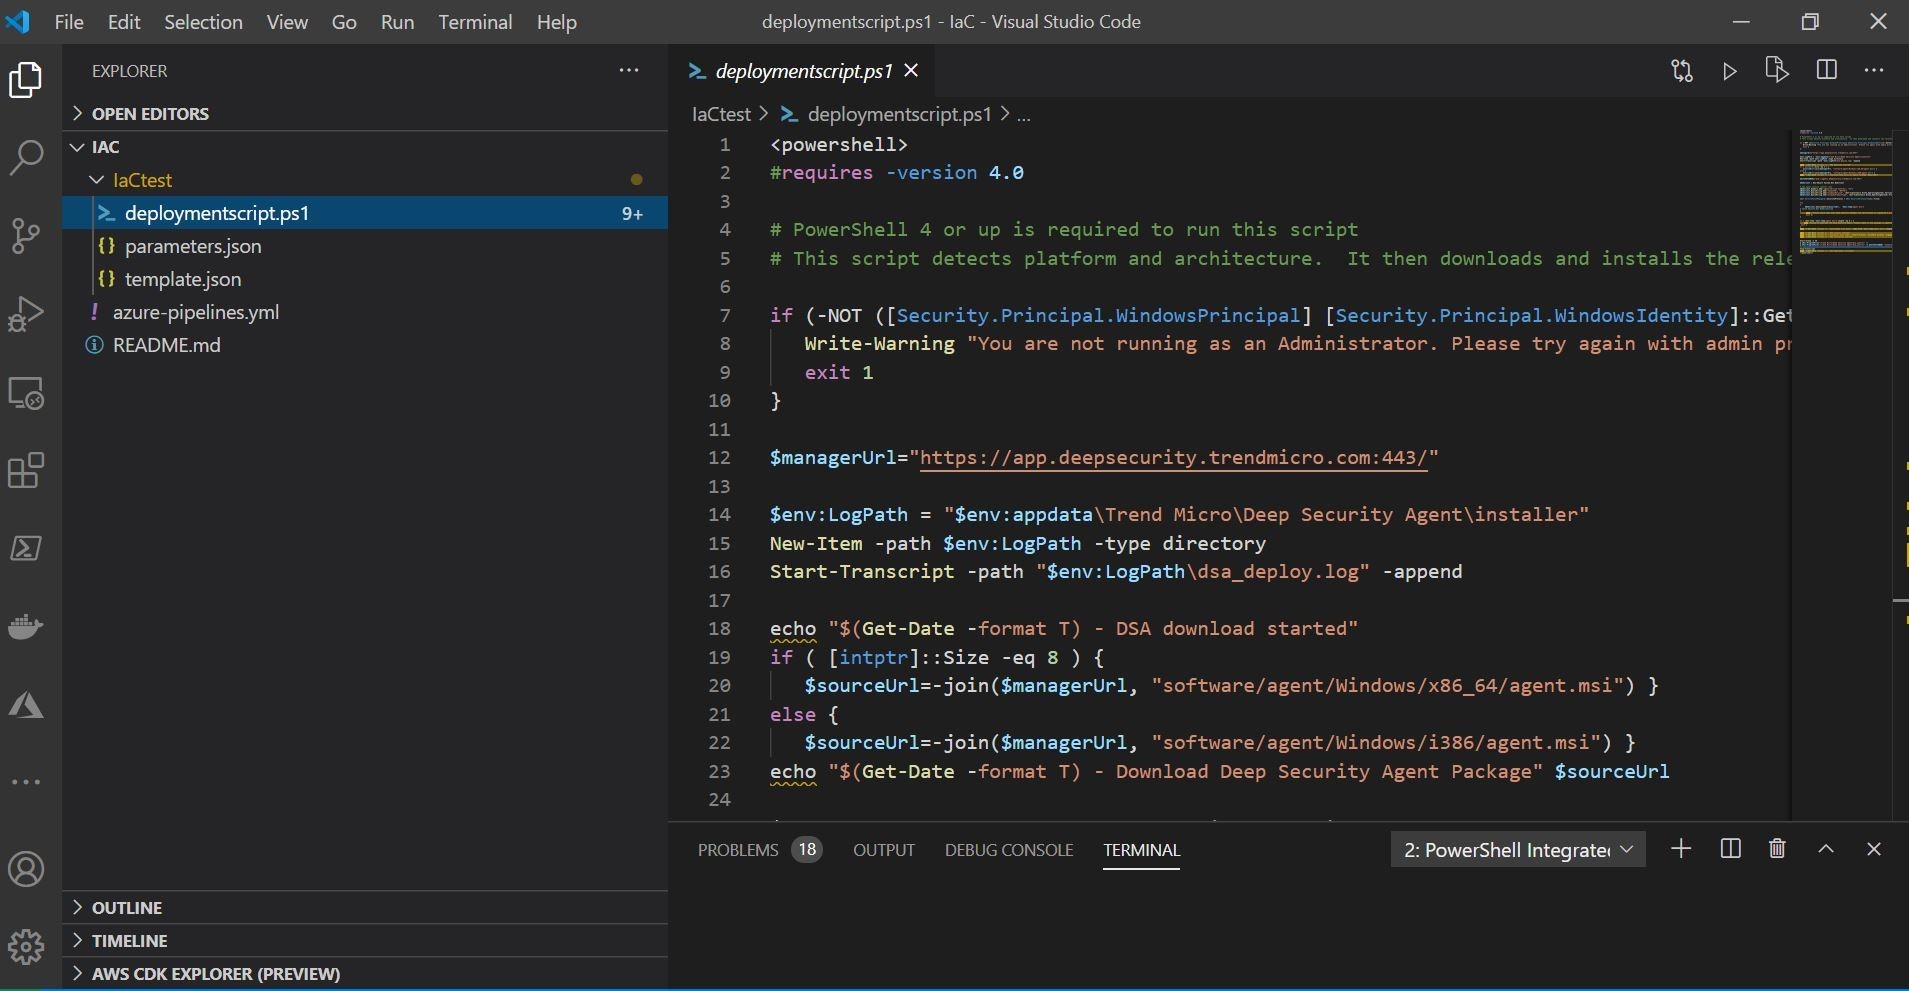
Let's take that Trend Micro deployment script that I saved off and shown below in Visual Studio Code, and add that to an Azure Storage Account as an example. I wanted to see how I can use that resource (Azure Storage Account) to store my script and pull it into a machine as a test.
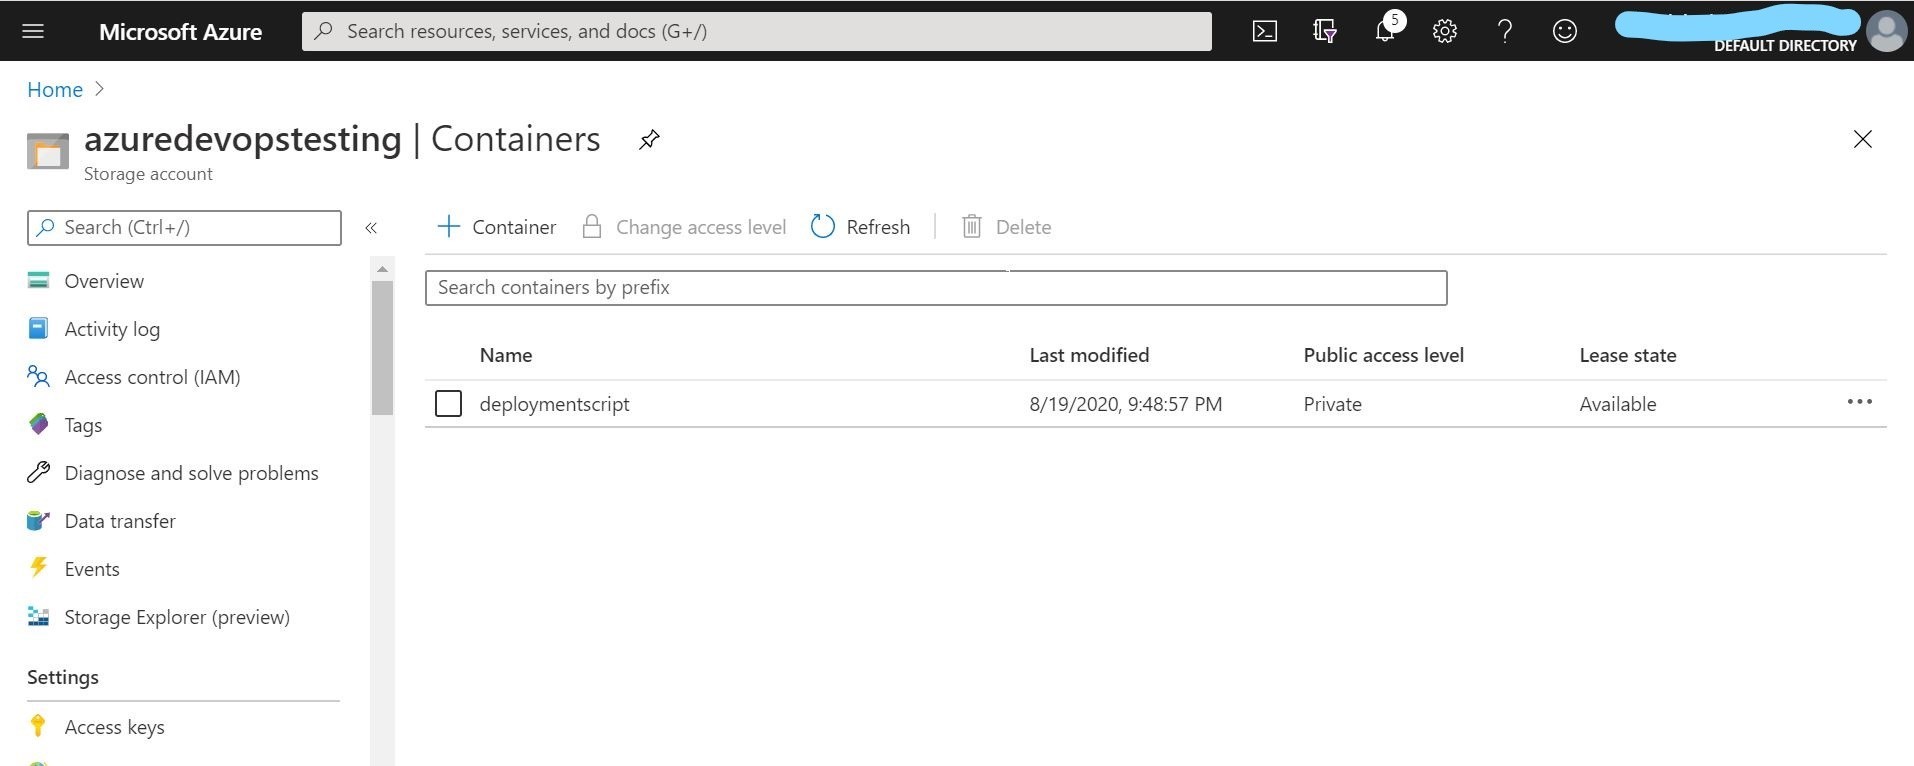
Here we see uploading to an private Azure Storage Account.
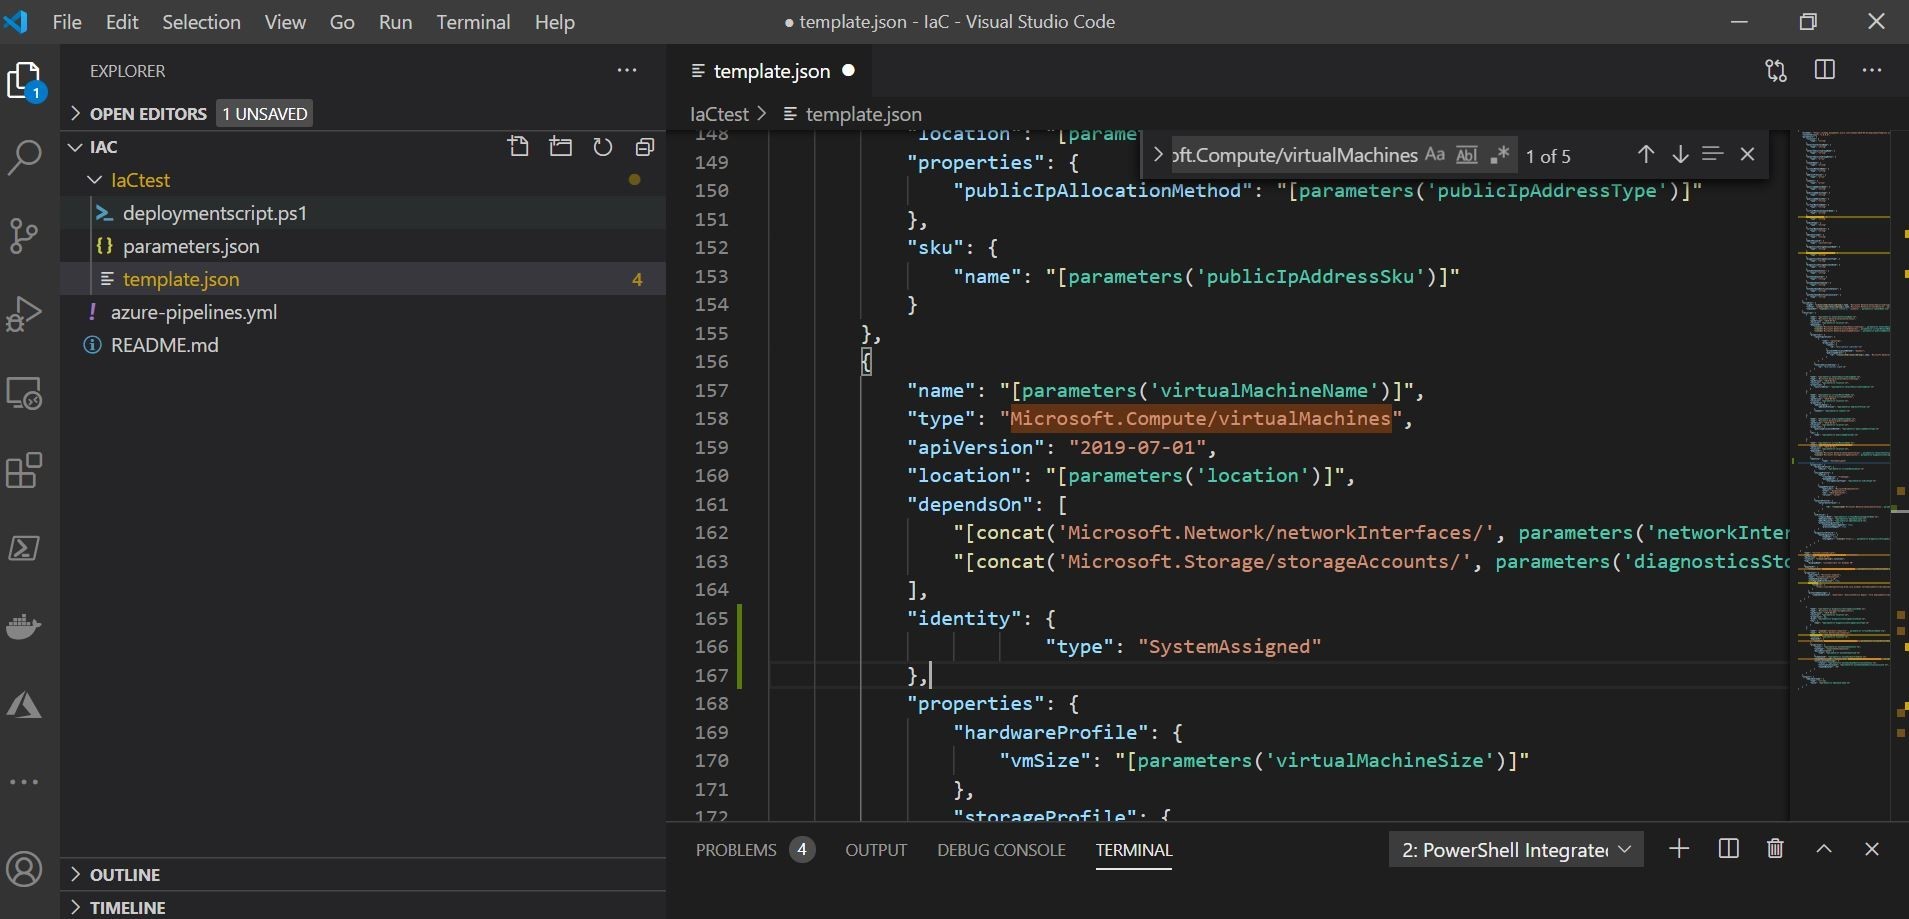
To restrict access just to the pipeline script and the associated Azure Storage Account you can use a SAS URI and token, or you can use a Virtual Machine managed identity. The managed identity will restrict access from the newly created Virtual Machine identity to the Azure Storage Account via RBAC role assignment. Either way will work, just make sure that the access you choose to the Storage Account that contains your deployment script is set to Read Only rights! I did that for testing and experimentation!
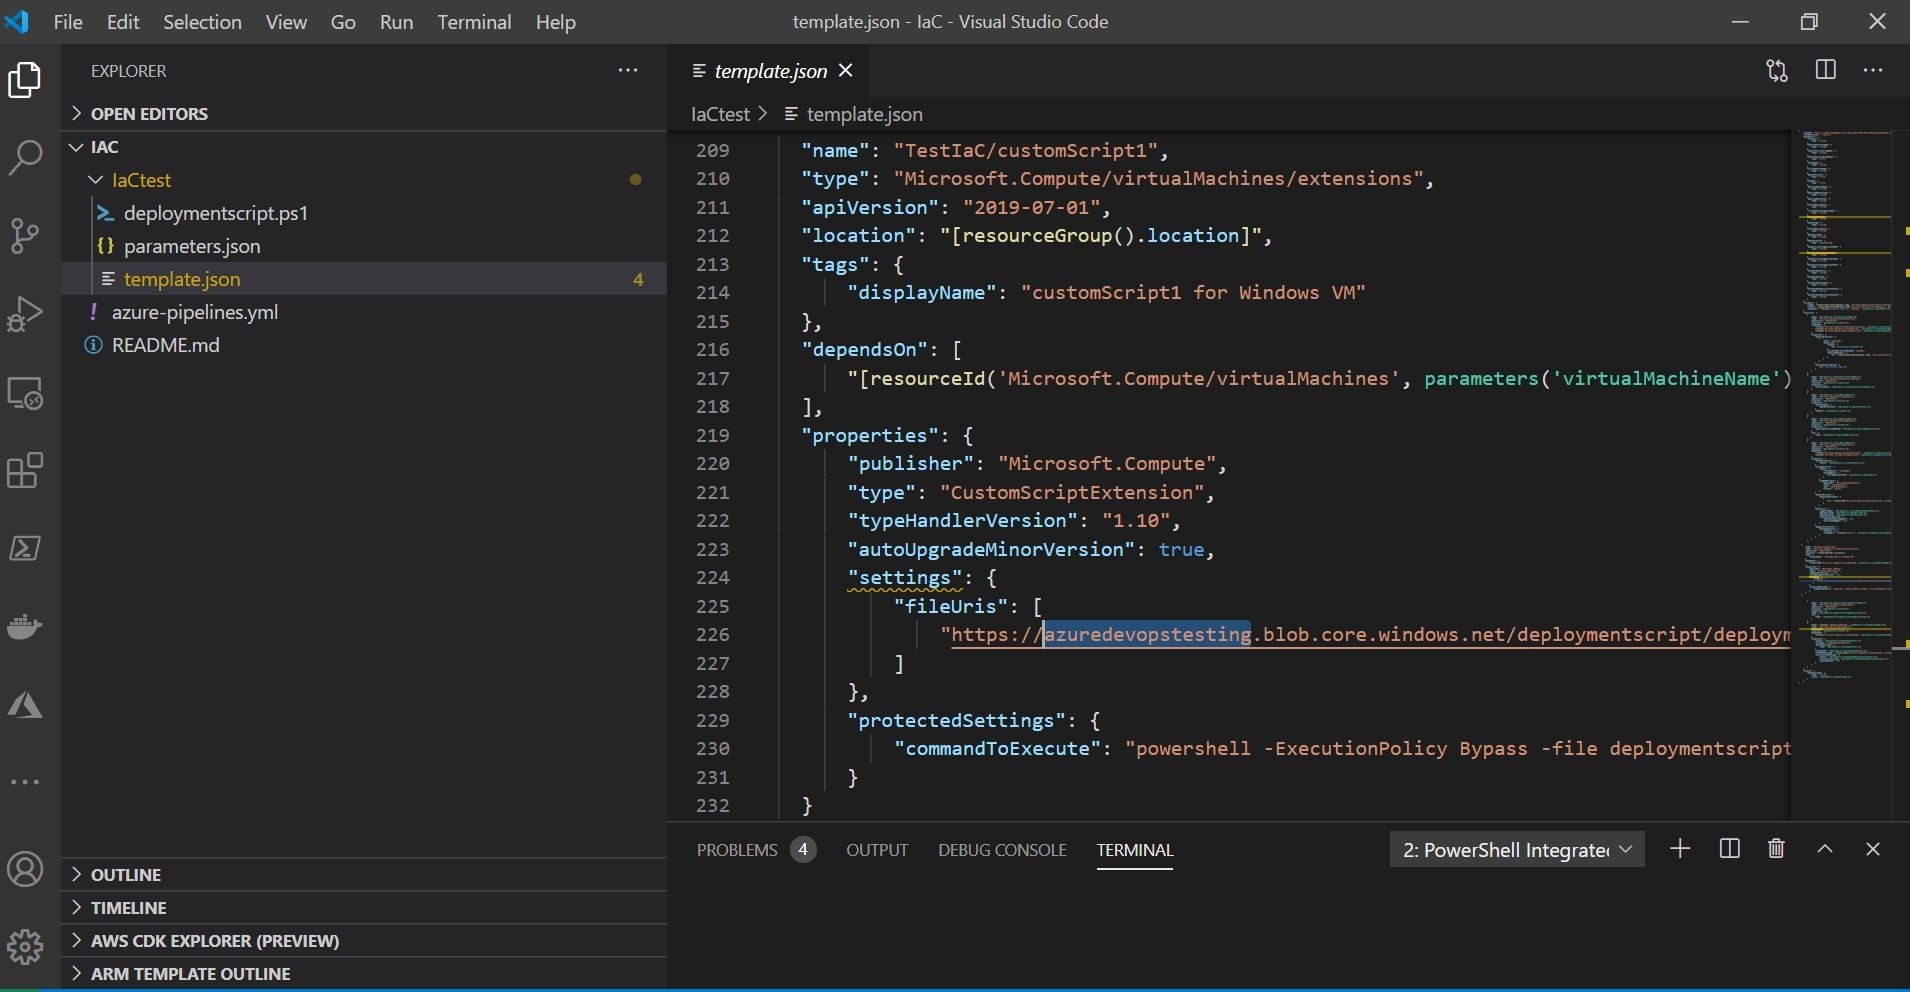
You then want to add and utilize a new ARM resource in your template as a custom script extension. This ARM resource extension works for both Windows and Linux. You can use the ARM extension for Visual Studio Code to generate the template code for you. That helps! This can utilize the system managed identity option, or SAS URI whatever you like to choose. This custom-script extension resource will then run the Trend Micro deployment script stored in the Azure Storage Account. I am showcasing this below using the SAS URI/token below as an example with the custom script extension resource being called from the Azure Storage Account and ran on the Virtual Machine.
You can go ahead and commit these changes and push away!
The pipeline should kick off automatically based on the committed changes and update the Azure Virtual Machine with Trend Micro Cloud One Workload Security. This is done by running the read only script pulled out of the Azure Storage Account by the pipeline script using the SaS URI/token. This is shown below with the completed Azure DevOps pipeline job, and the Trend Micro Cloud One Workload Security console showing the newly provisioned and protected machine!
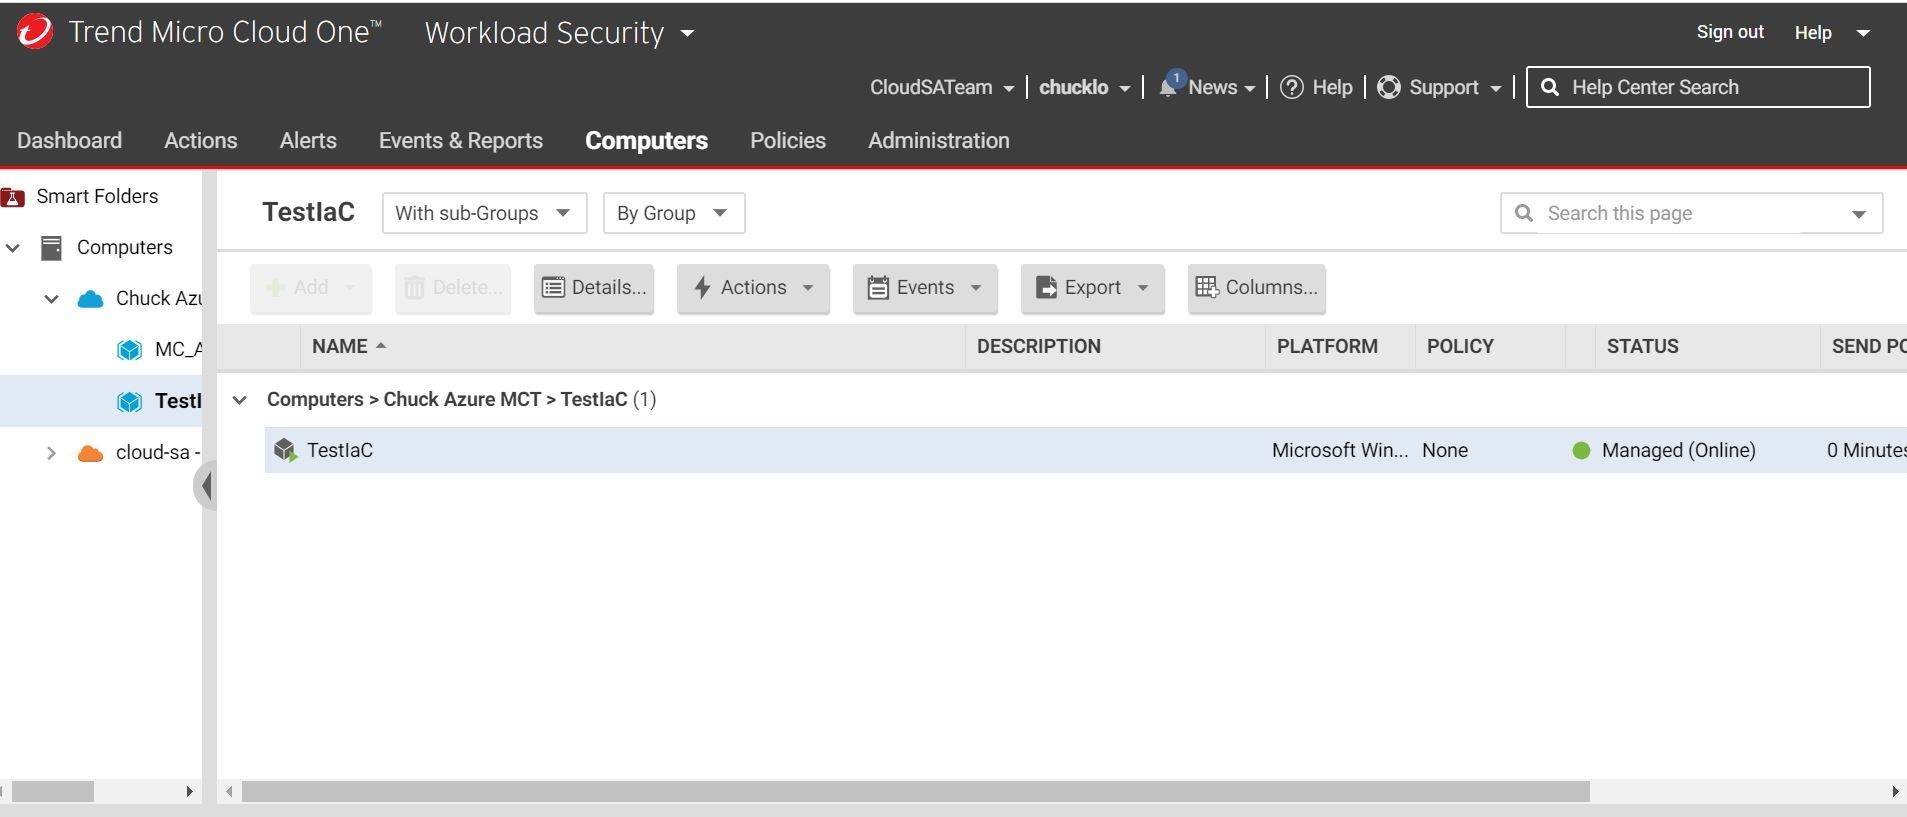
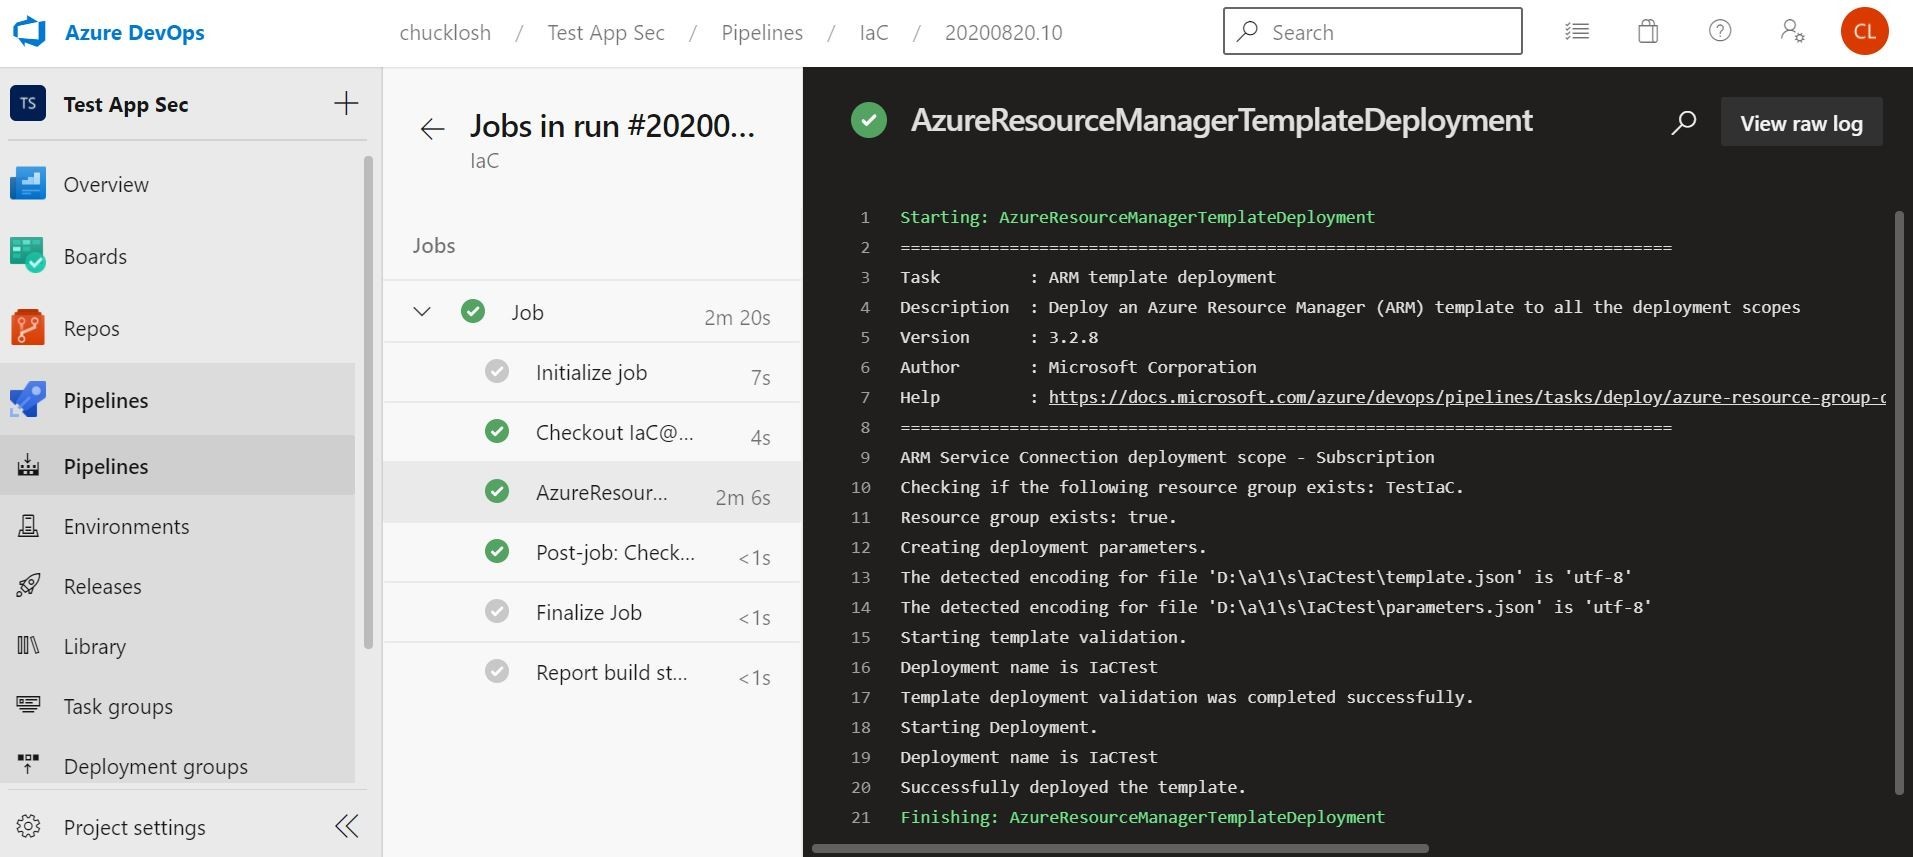
Cool! That all worked! Pretty cool experiment!
Now, another way that I found to do this with IaC and Immutable Architecture is to use Packer in Azure DevOps. You can package up a custom Azure Virtual Machine Image based on the official Microsoft images to start, and then customize it with the Trend Micro agent pre-installed in the image. This custom image can be used to build new machines. Then you can then turn around and run an associated ARM Virtual Machine deployment with that custom image all in one pipeline. Personally, I really like this option and preferred it over the other! It was fun to experiment! Enjoy!
We are going to accomplish this new build structure below in a brand new Azure DevOps pipeline and associated Azure DevOps Repo. You can see the PackerBuild step I added!
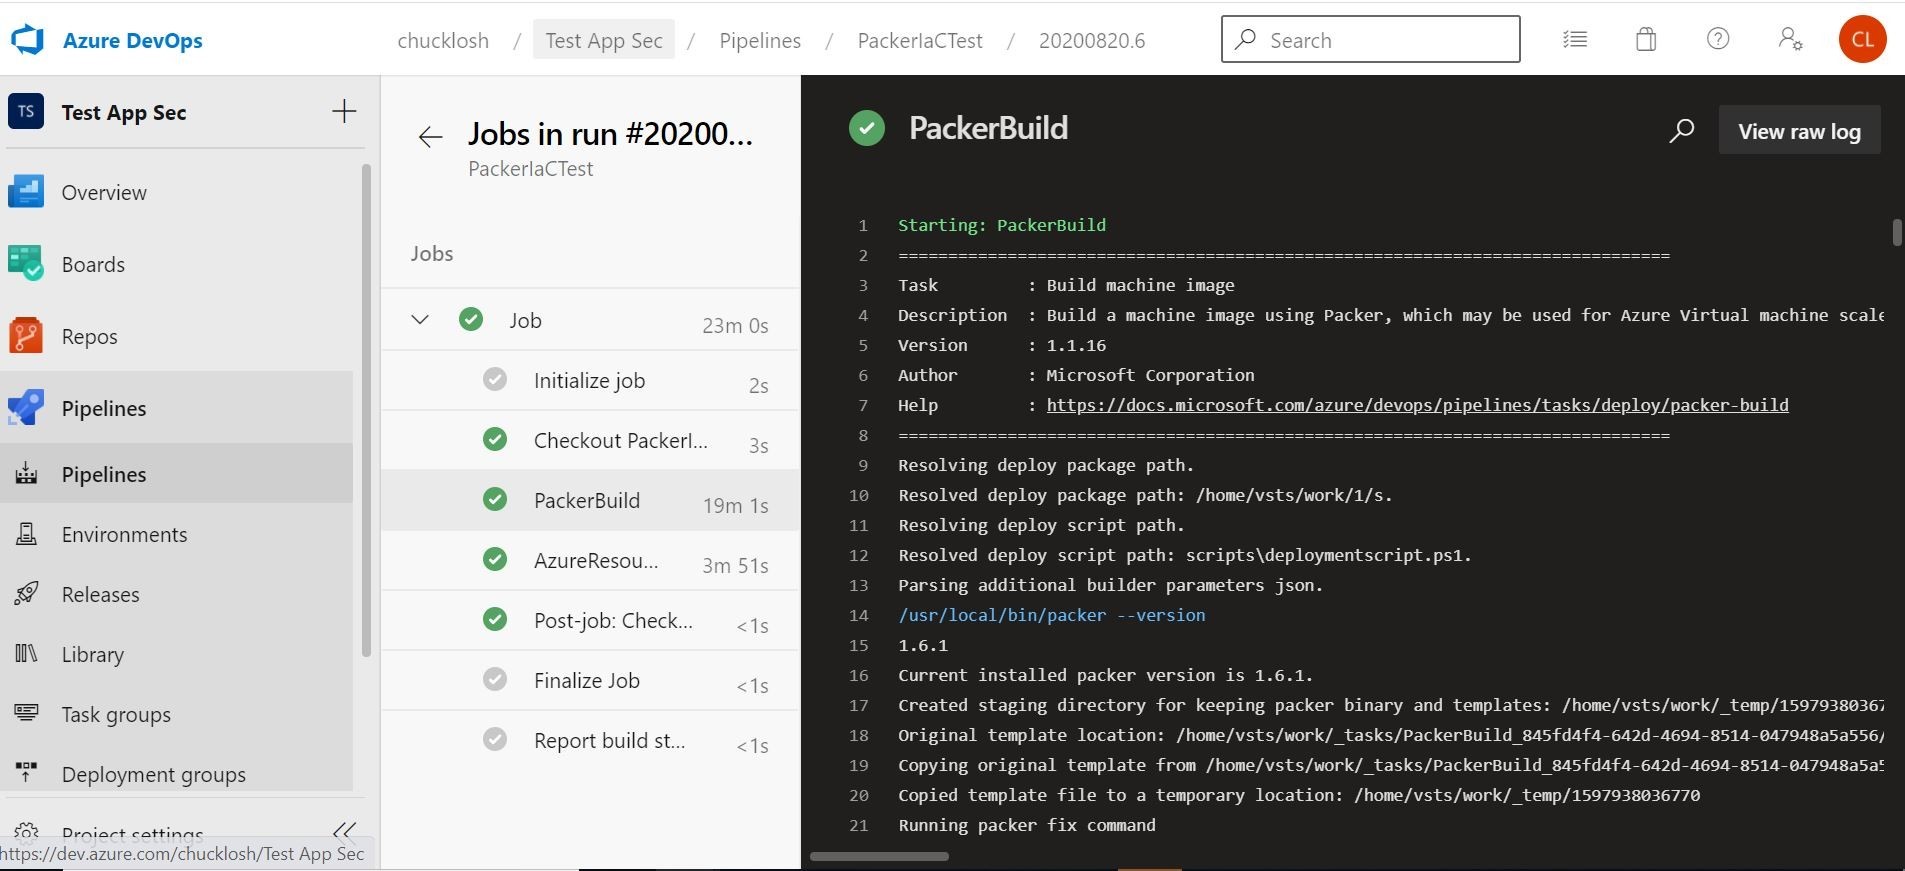
Here is that new Repo created below. Really the only key differences in the ARM template portion are to change out the Microsoft Windows 2016 standard image to the Packer custom image that will be created in the previous Builder step in the pipeline. We don't need to run the deployment script in the ARM template phase of the deployment because it will be run inside the custom image to be reused. Most of the changes are done in the pipeline config. I like it! I like it a lot!
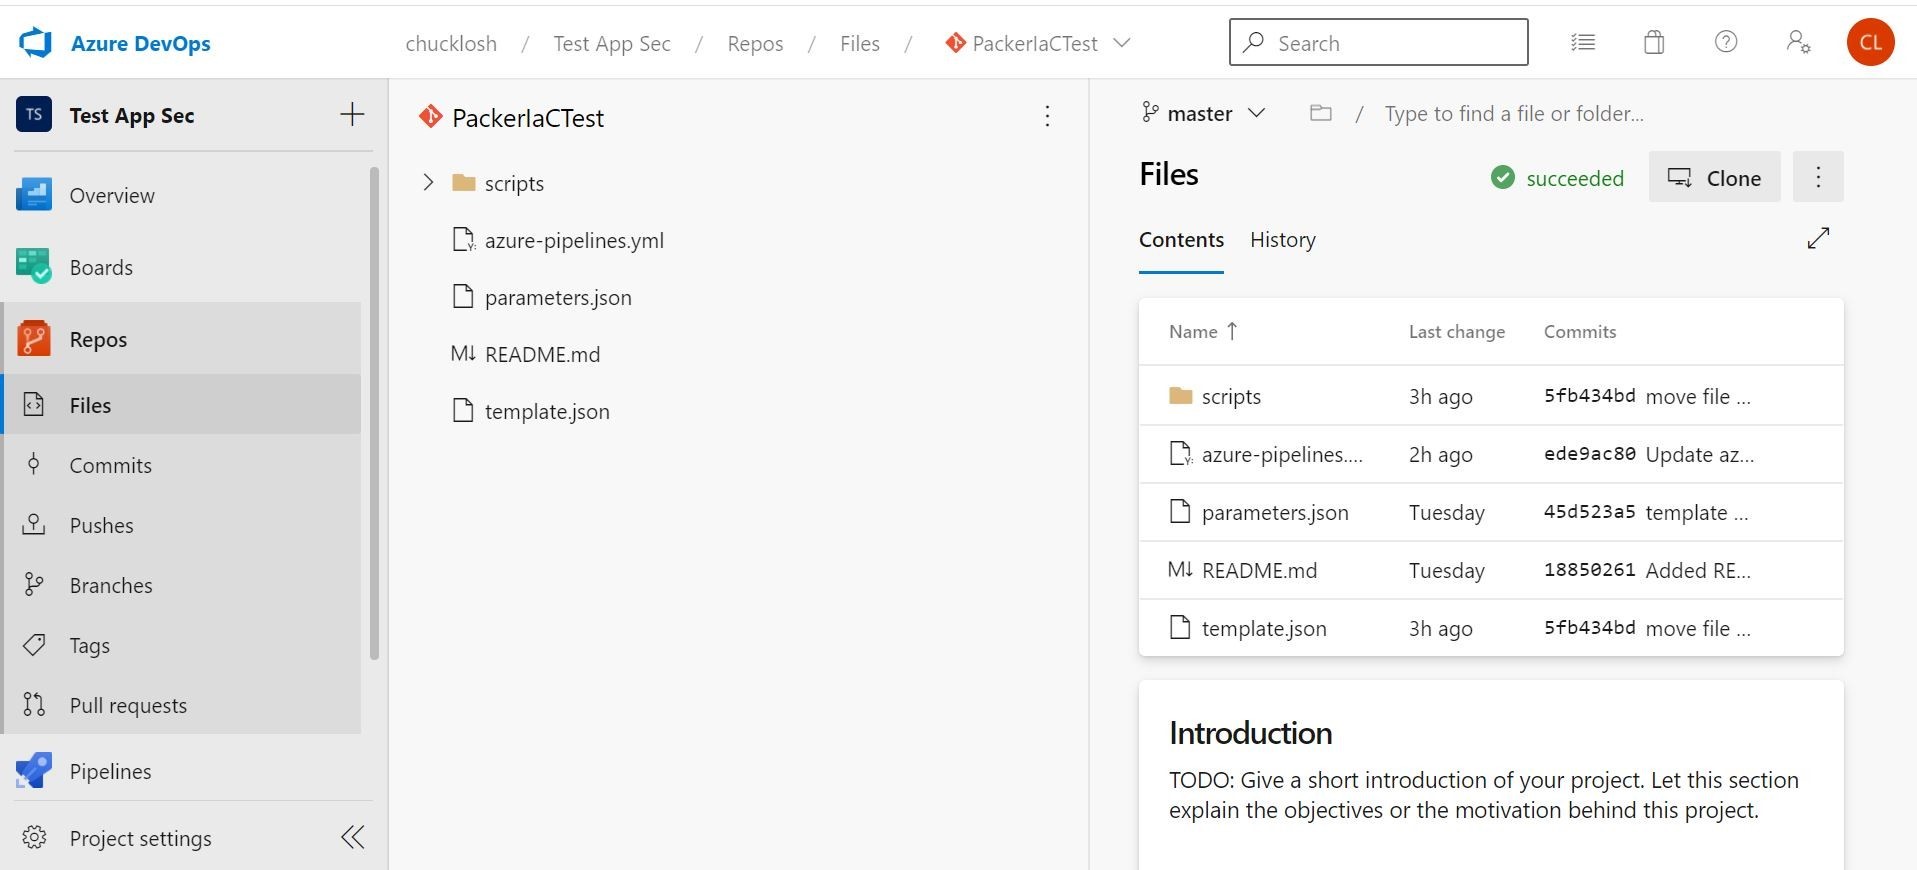
Ok, you can see the new Repo above that I cloned locally in Visual Studio Code below.
I added a scripts directory and placed my Trend Micro Cloud One Workload Security deployment script (sames as before downloaded from Trend Micro) in there to be pulled in by Azure DevOps and Packer.
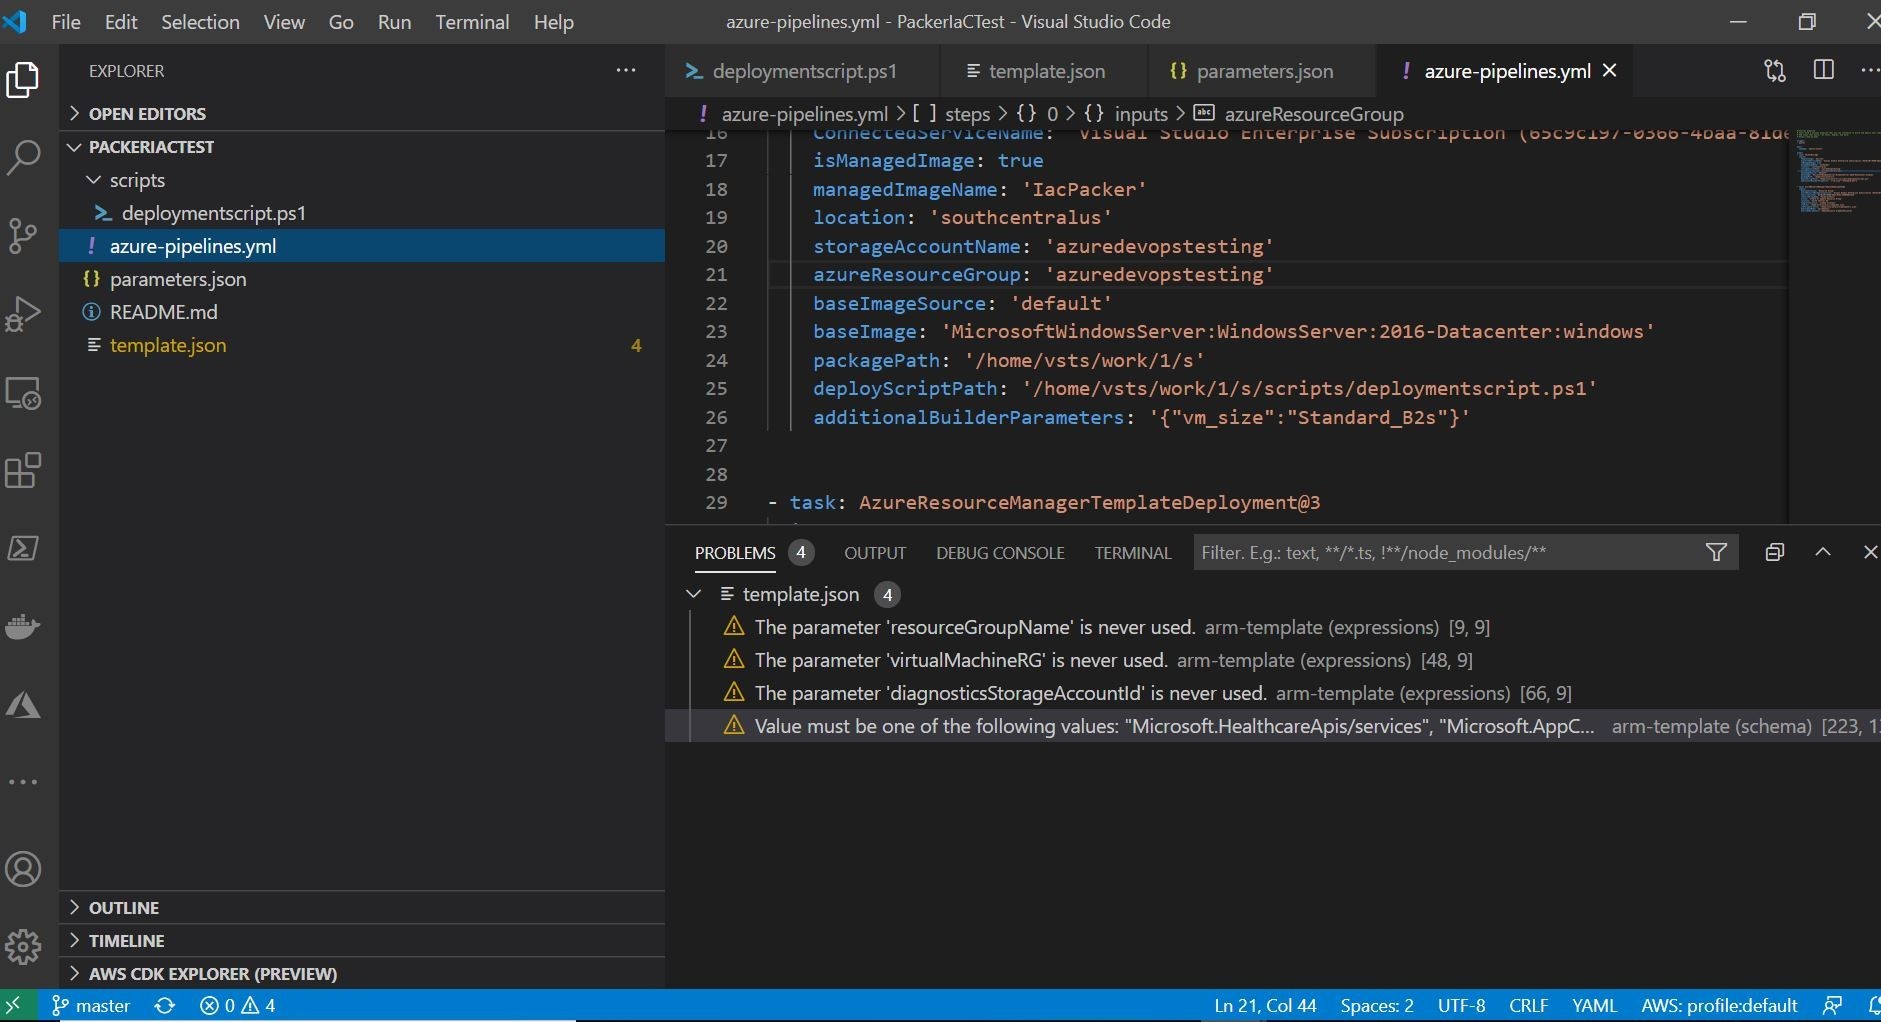
In my pipelines.yml file, I have added a couple of new tasks to the pipeline. First, is the Build Machine Image Task (Packer).
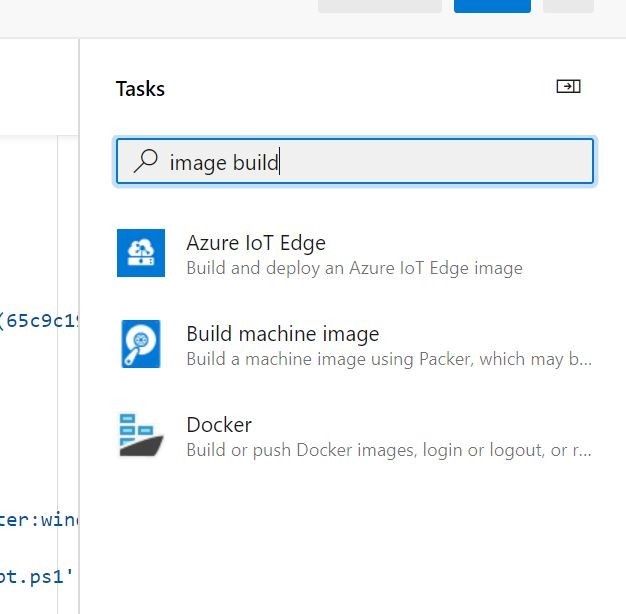
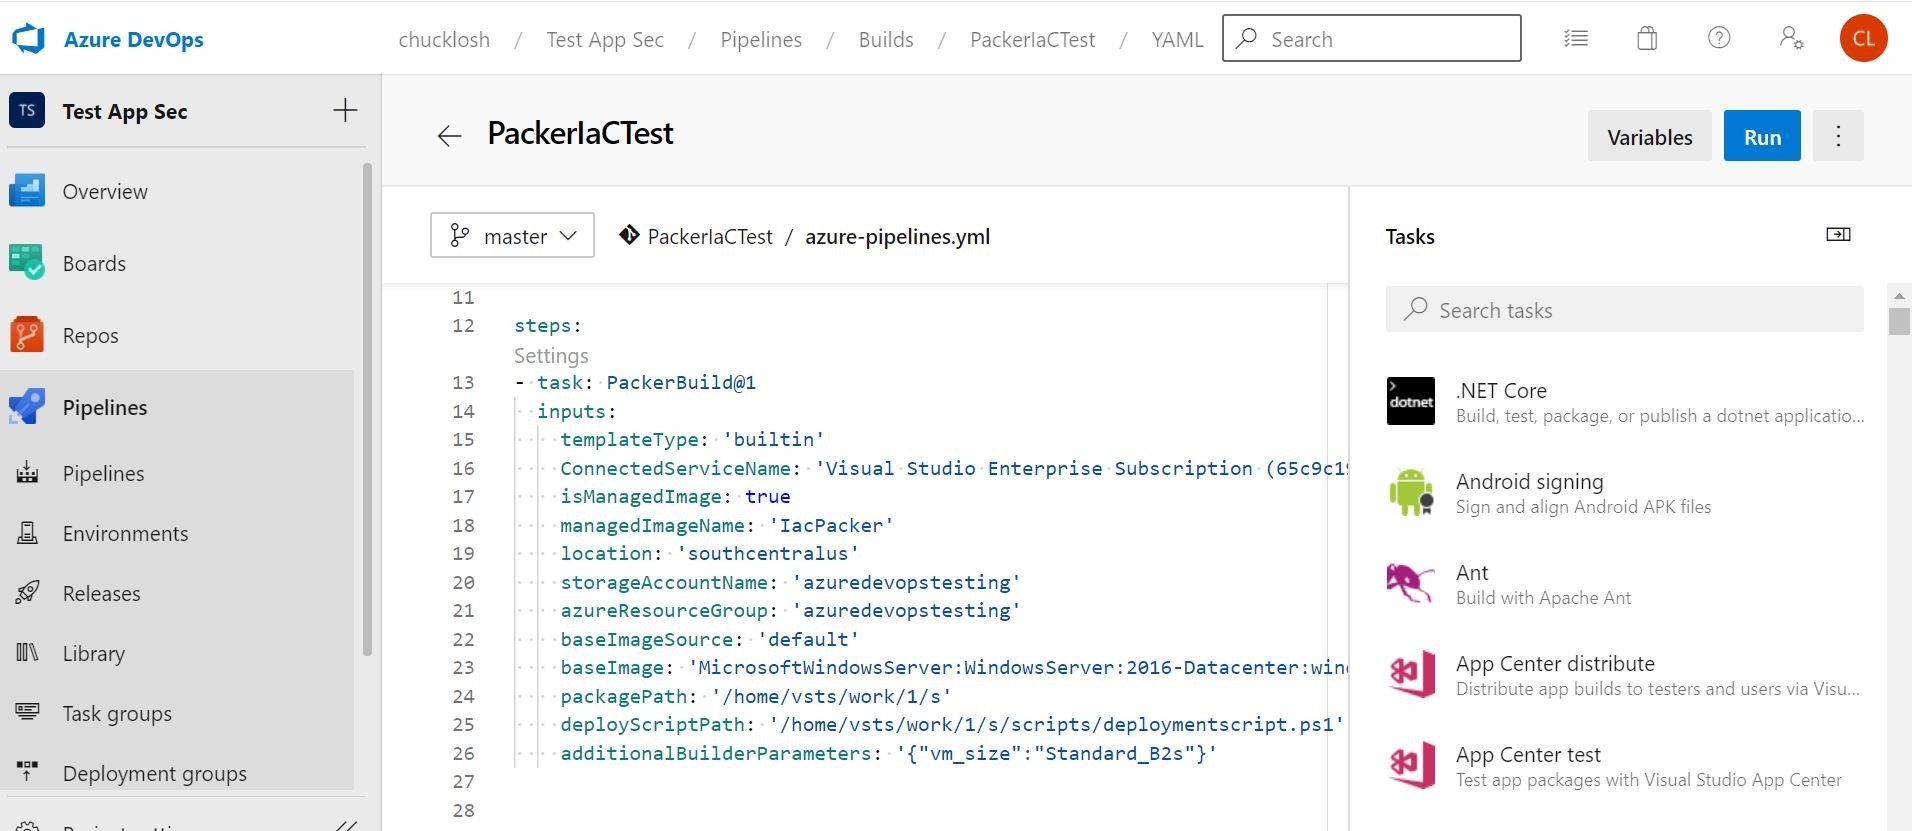
This is my packer build task for Azure DevOps which is doing the building of the Azure Virtual Machine utilizing Packer.
What I am doing in this task is utilizing a standard Microsoft Image 2016-Datacenter. Then, I am customizing it with my Trend Micro deployment script to install and configure Trend Micro Cloud One Workload Security. It is then re-packaged back up as a custom image, and stored in an available Azure Storage Account.
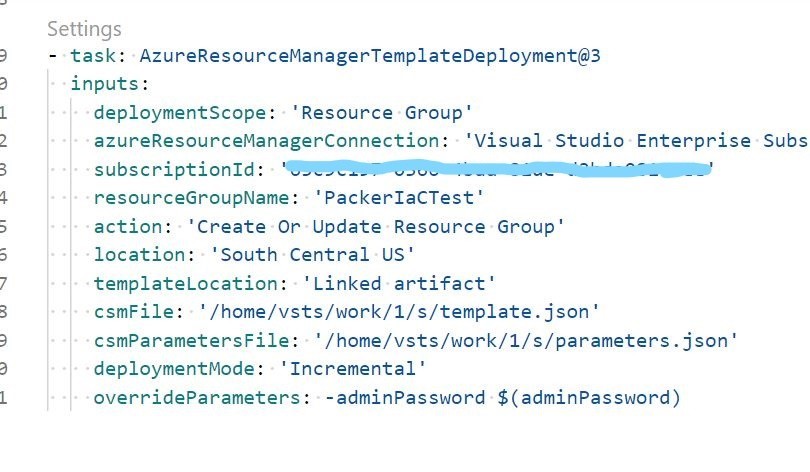
The second task in the pipeline is more familiar to us. It is deploying a new Azure Virtual Machine with that custom image. This is using the ARM deployment task of the pipeline.
Here you can see the Azure Machine Image Builder task executing with the associated Packer job. In this screenshot, we can see the Trend Micro Cloud One Workload Security Script actually being executed inside the Azure Virtual Machine Image prior to the Image being created. Cowabunga!
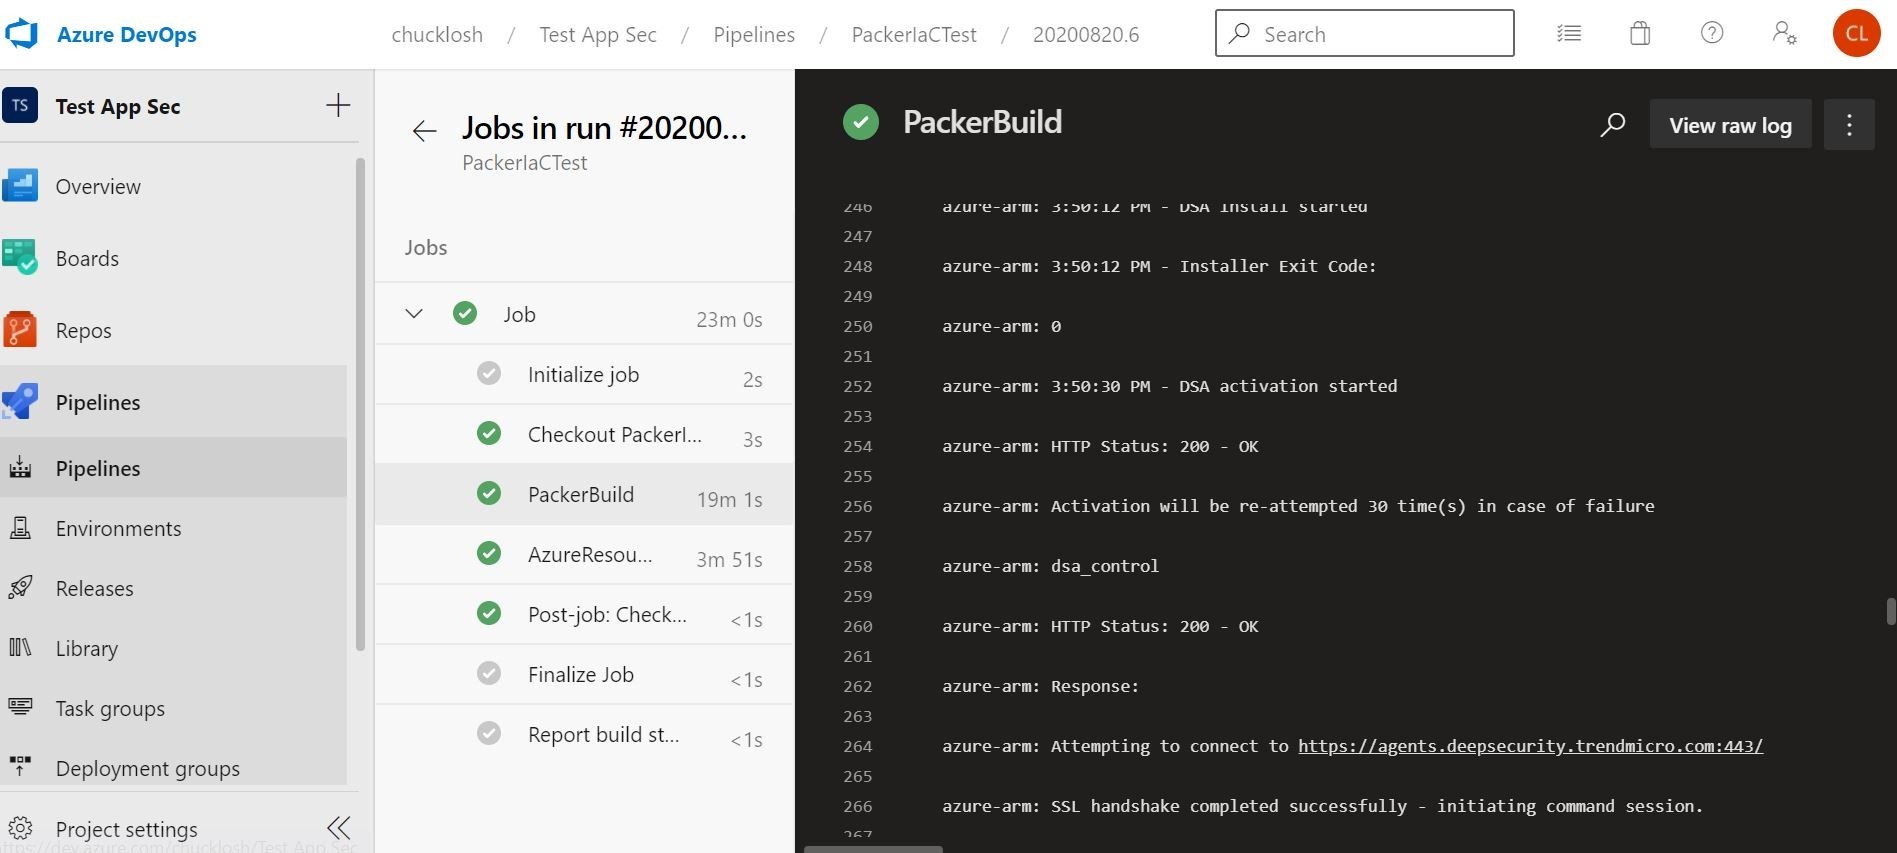
Once that Virtual Machine is successfully built, the machine will be sysprep'ed and shutdown and captured as an image and stored in the Azure Storage Account for reference and reuse. Then the temporary Azure Resource Group will be deleted and cleaned up! Wow! That is a huge time saver rather than doing that by hand on the Azure Portal!
Next, our ARM deployment task will key up, and deploy our new custom image as a brand new Azure Virtual Machine!
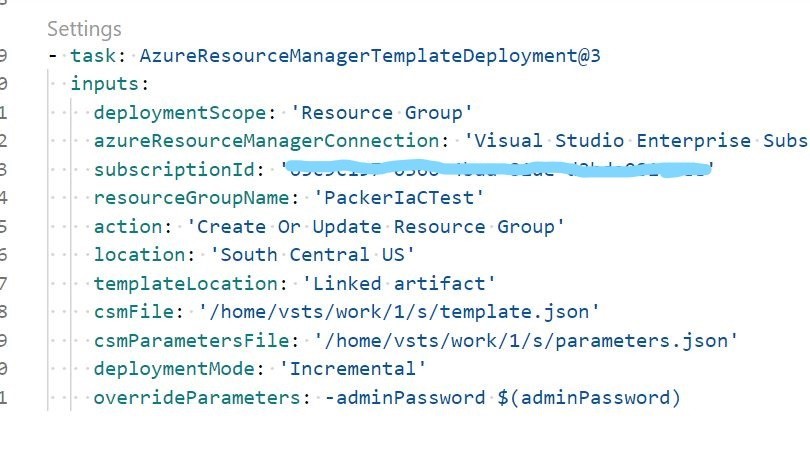
Ok, and we can see that corresponding build step in our pipeline!
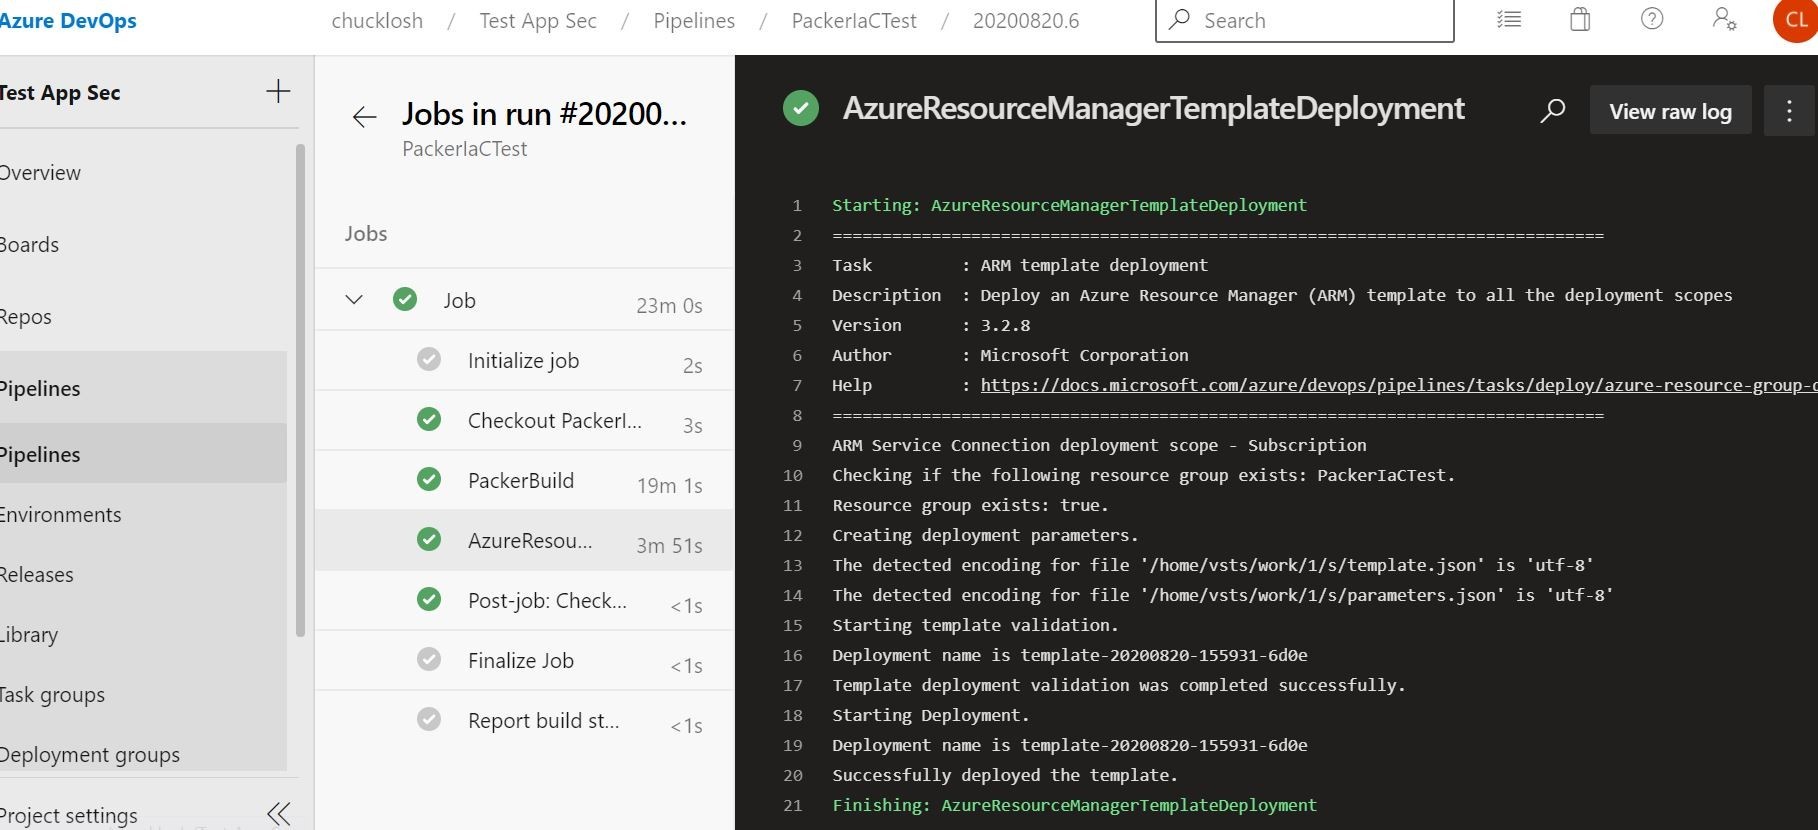
Cool, looks like our all of our job stages have executed successfully! PackerIaCTest pipeline is completed!
Let's check in on our Trend Micro Cloud One Workload Security console and see if the newly created Virtual Machine from the packer custom image shows up in our Microsoft Azure Subscription. There it is! It's running and protected all through automation! Sweeeeeeet!
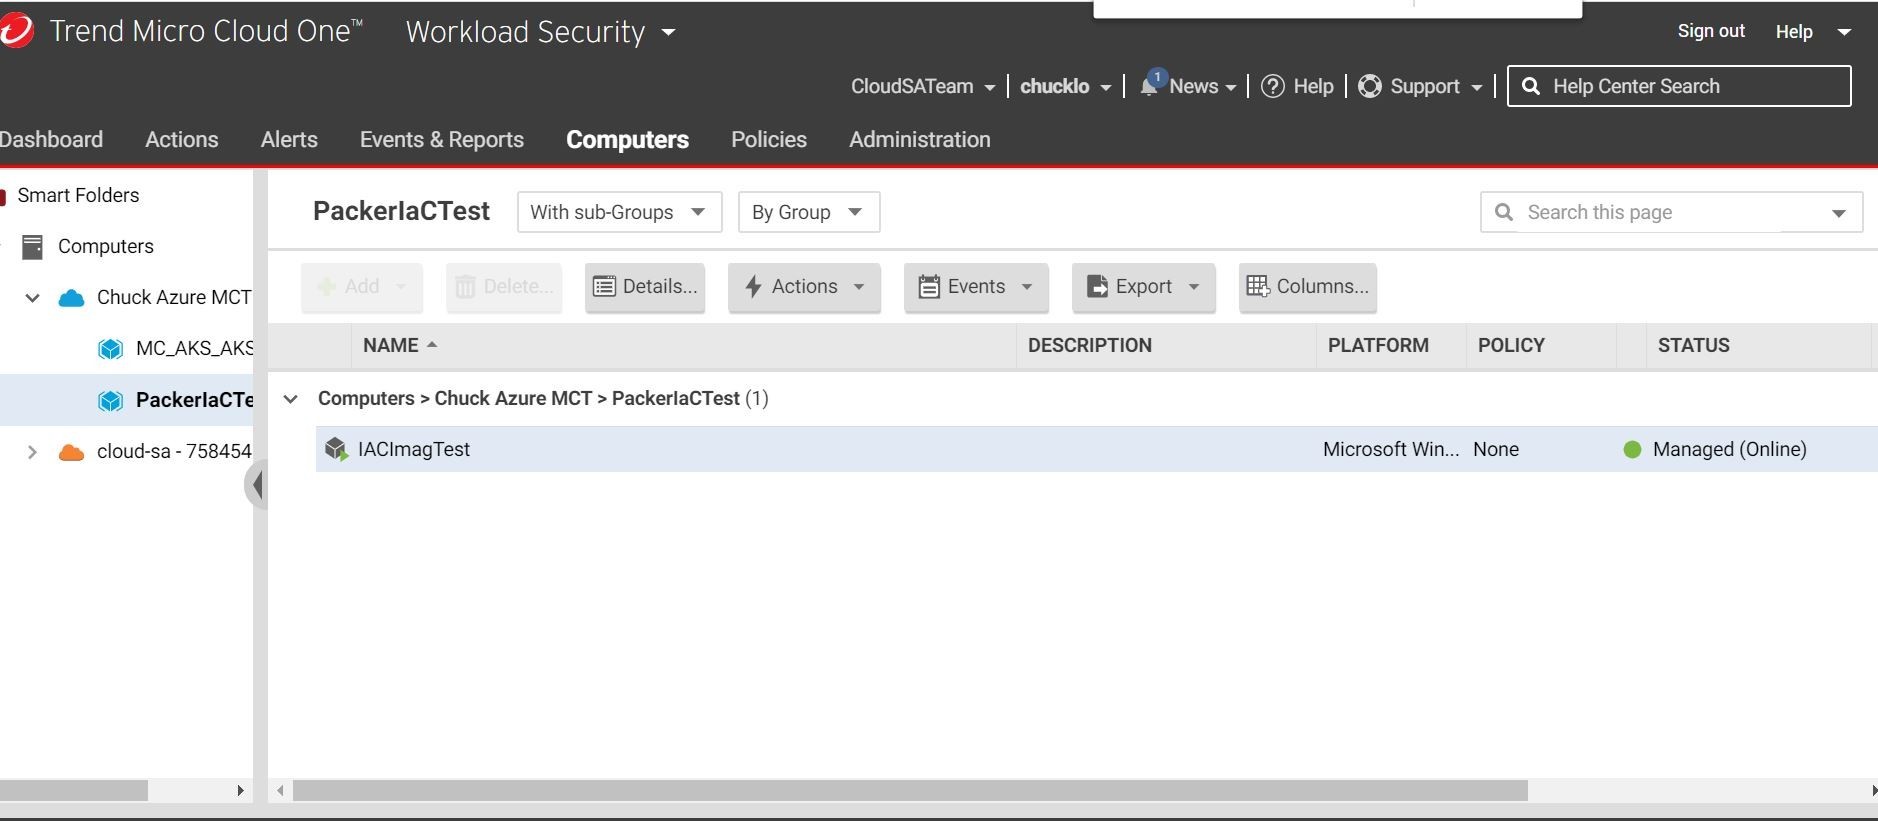
There we go! That is a beautiful site! All automated with IaC!
Ok, this is really cool! So, we have experimented with Infrastructure as Code (IaC) today utilizing Azure Resource Manager (ARM) templates, and Immutable Architecture with Packer and Virtual Machine Images.
We tied everything back together again with automation in mind utilizing Azure DevOps tooling and Visual Studio Code. Great stuff! Thanks for stopping by and I will see you next time! This was a lot of fun! I hope you enjoyed it as much as I had learning new things and experimenting!
References:
https://docs.microsoft.com/en-us/azure/virtual-machines/extensions/custom-script-windows
https://docs.microsoft.com/en-us/azure/devops/pipelines/tasks/deploy/packer-build?view=azure-devops
https://docs.microsoft.com/en-us/azure/devops/pipelines/tasks/deploy/azure-resource-group-deployment?view=azure-devops
https://www.trendmicro.com/en_us/business/products/hybrid-cloud/cloud-one-workload-security.html
https://docs.microsoft.com/en-us/azure/azure-resource-manager/templates/overview


